
Add taxes to ticket price, store items, or auction items
You can add sales tax directly to the price of a ticket, store item, or auction item. Zeffy applies the tax at checkout, shows it to buyers in their transaction receipt, and reports it in the payment details, the payments export, and the payout breakdown. Tax at checkout is available only to organizations in the US and Canada.
If your organization is outside the US or Canada
Include the tax in the price of the ticket or item instead of charging it at checkout. For example, if you need to charge 15% tax, set the price of the item so it already includes that 15%, and note in the item description that the price includes tax.
Add a tax to a ticket or item
Add a tax in the ticket or item editor, either by creating a new tax or reusing one you've saved before.
Under campaigns, click on edit to the right of your campaign
Once in your editor, click on ticket options below your existing ticket and turn on the "Tax at checkout" option
Open the tax dropdown and choose a previously saved tax, or select + New tax to create one.
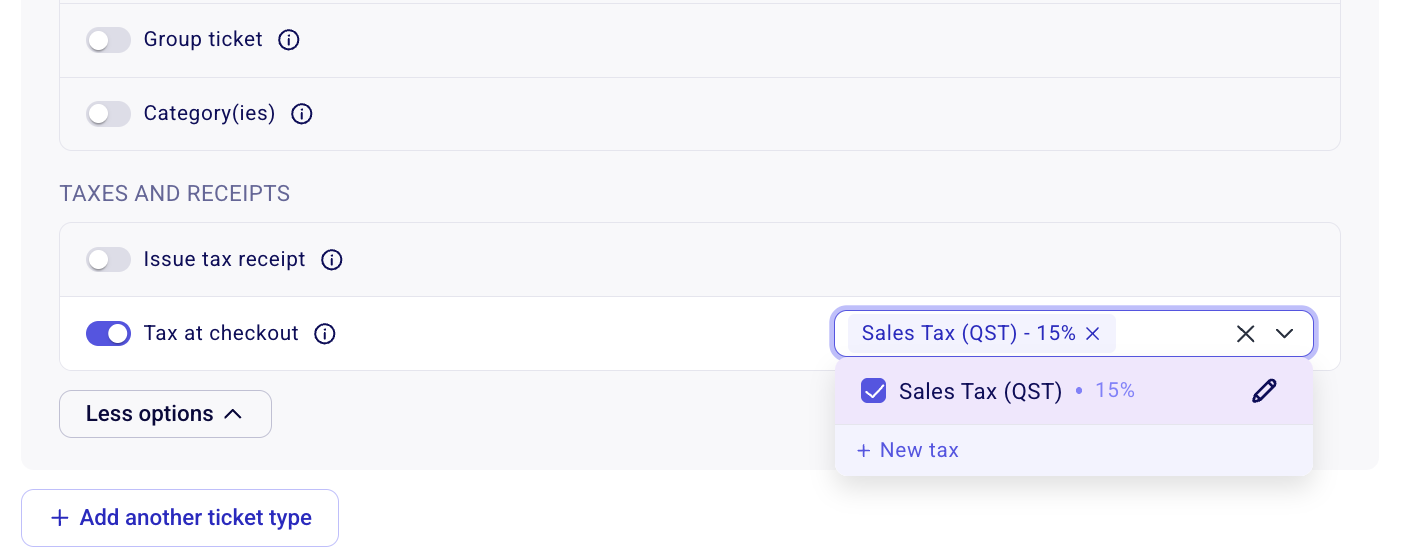
You can add multiple taxes to each item if needed - for example, if you need to charge both federal and provincial taxes.
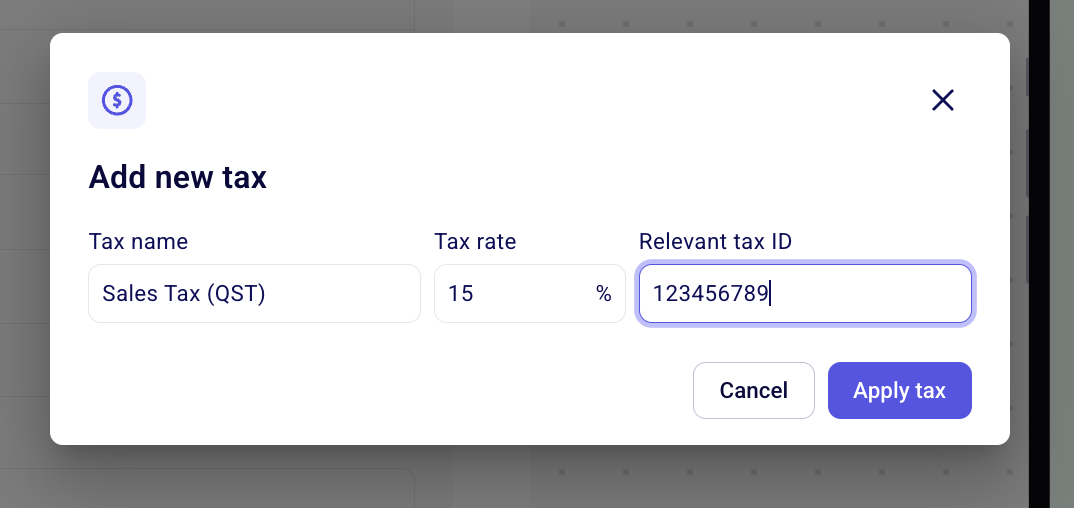
If you're creating a new tax, enter the tax name (visible to buyers), the tax rate, and the relevant tax ID, then click Apply tax.
Save the form.
Saved taxes are available to reuse on other tickets and items, so you don't have to re-enter the same tax each time. The dropdown lists your saved taxes and lets you search them.
Important: Taxes are specific to each ticket or item and must therefore be enabled individually. If you enable taxes for your first item (e.g., general admission) and have another item (e.g., VIP tickets), make sure taxes are enabled for both.
Add a tax to an auction item
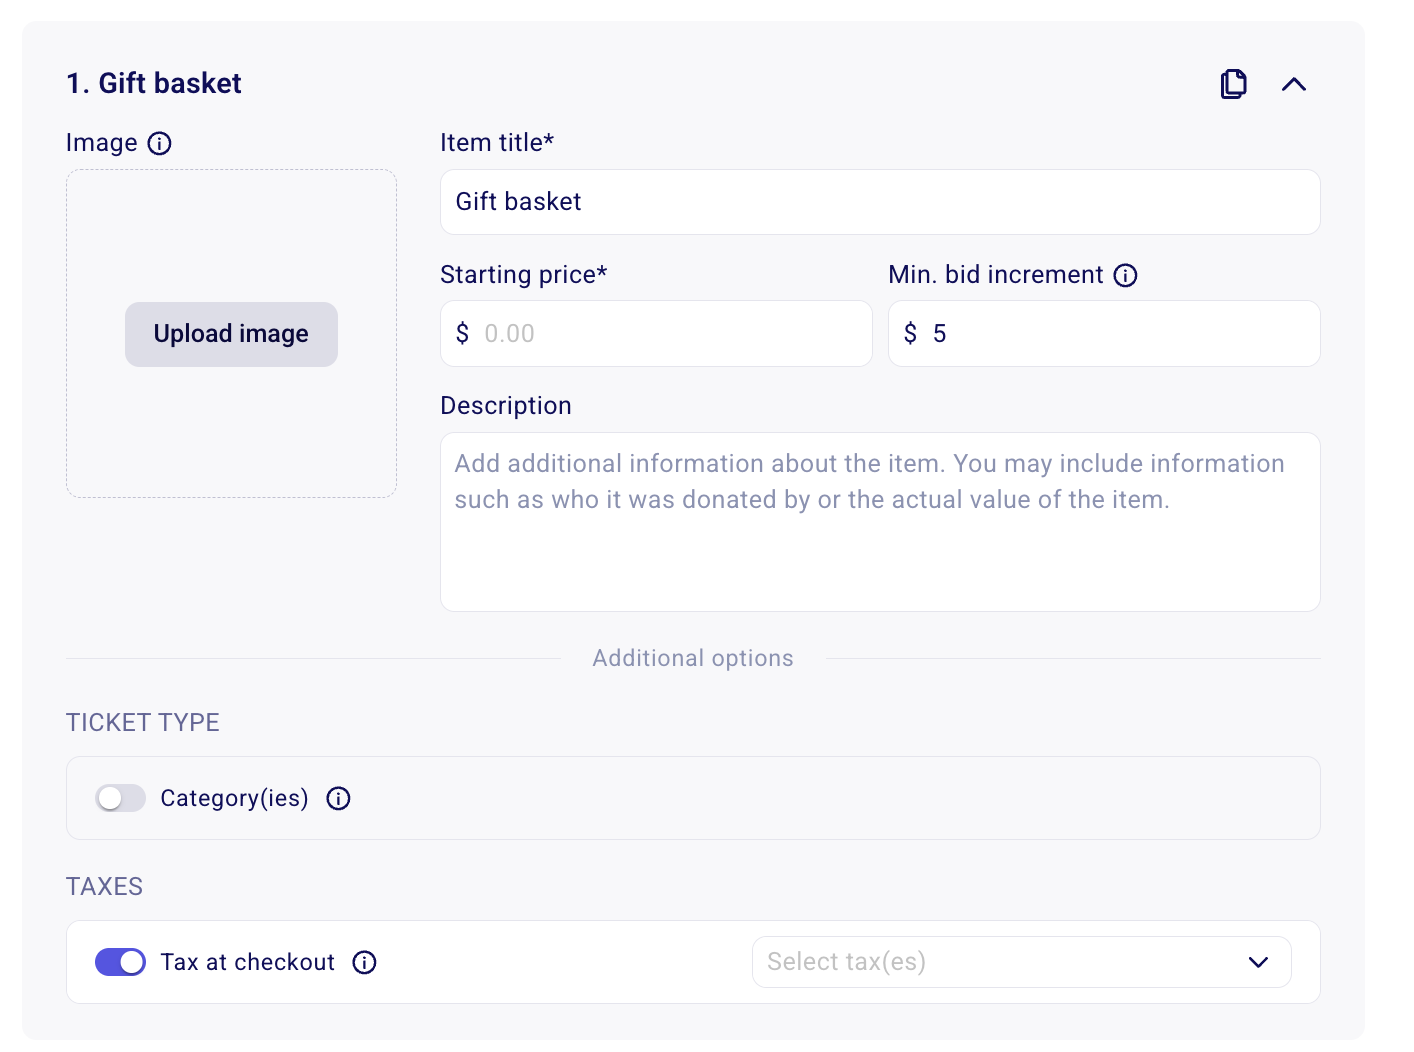
Each auction item has its own Taxes setting in the auction form editor. Turn on Tax at checkout for every item you want taxed.
In your auction form editor, go to the item you want to tax and scroll down to Additional options.
Under Taxes, turn on the "Tax at checkout" toggle.
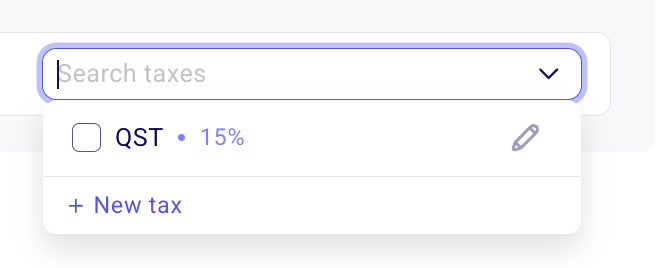
In the Select tax(es) dropdown, choose a previously saved tax, or select + New tax to create one.
Save the form.
What buyers see
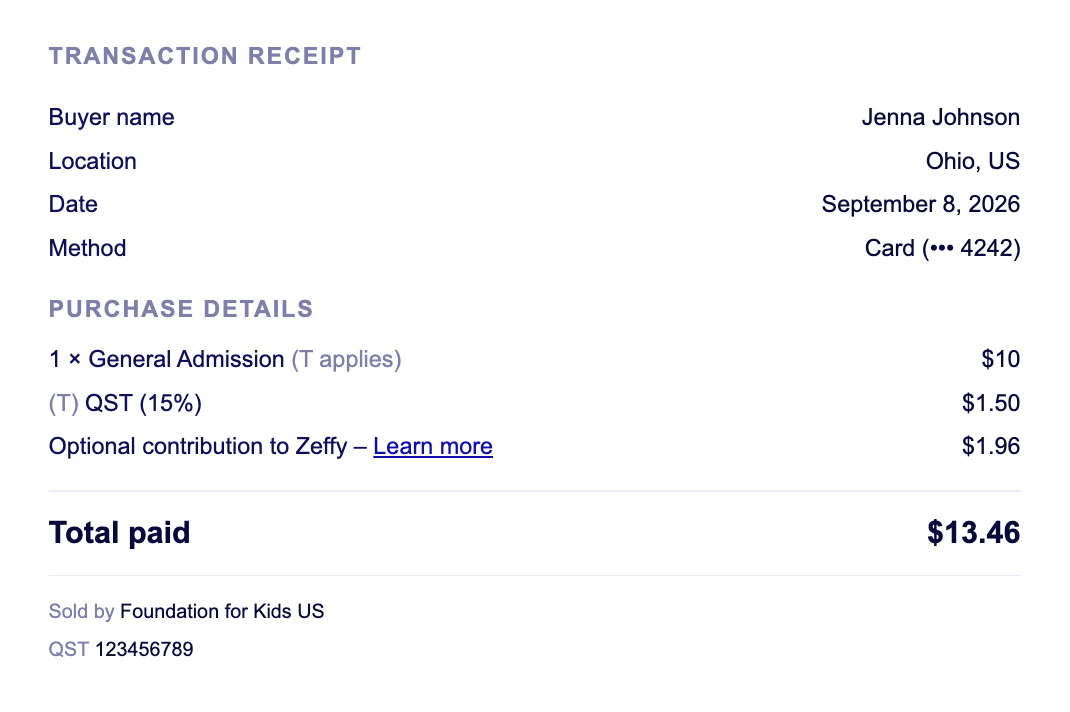
Buyers see the tax as a separate line at checkout and in their transaction receipt, along with your tax number.
At checkout, the tax appears as its own line below the subtotal, and the total includes it.
In the transaction receipt (the confirmation email), the tax is listed as its own line under the purchase details.
Your tax number appears at the bottom of the transaction receipt.
View the tax charged on an individual payment
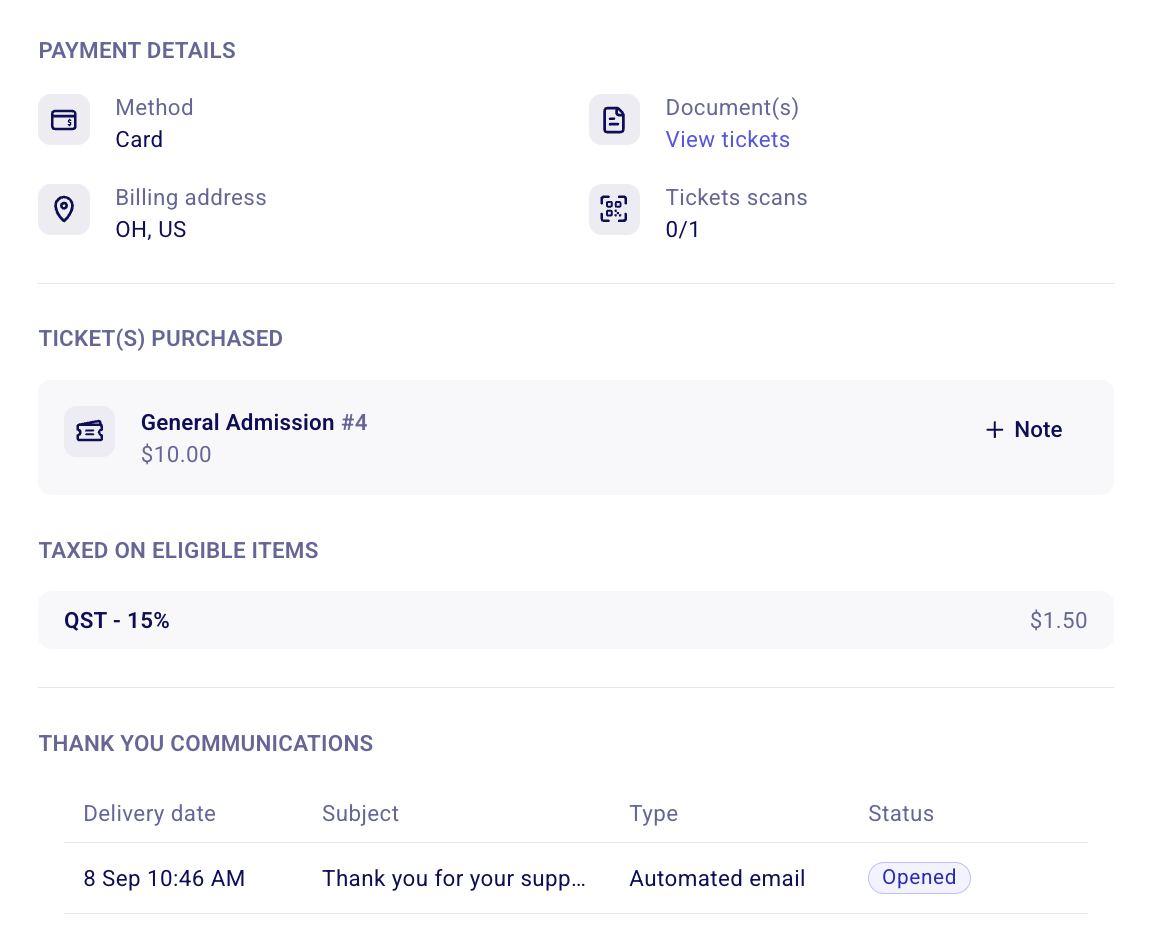
Open a single payment to see the price and the tax charged on it.
Go to Payments and locate the payment.
Click anywhere on the payment row other than the donor's name. Clicking the donor's name opens the contact page; clicking elsewhere on the row opens the payment details.
In the payment details that open, review the price and the tax charged under Taxed on eligible items.
View taxes in the payments export
The payments export shows the tax on each payment in its own column.
The Total amount column includes taxes.
Each tax you charge gets its own column, so if you charge two taxes on an item, you get one column per tax plus a total tax column.
Use these columns to reconcile how much tax you collected on each payment and to report the tax you owe for each tax type.
View taxes in the payout report
The payout breakdown shows how much of each payout was tax.
Go to Finances > Payouts.
Click the payout you want to review.
In the payout breakdown, review the amount for each tax and the total tax included in the payout.