
How to Create and Host a Raffle on Zeffy
Create a raffle by starting a Raffle / Sweepstakes campaign and choosing Standard Raffle as the lottery type. Participants purchase tickets to enter, so payment is required.
Before you begin, make sure that your raffle draw meets the rules issued by the Gaming Authority of your province, state, or region. In some jurisdictions, you may need to obtain a license for your lottery. For detailed information on licensing requirements, gaming authority contacts, and answers to common questions about using Zeffy for raffles, see Is Zeffy a licensed Electronic Raffle System?
For how Standard Raffle compares to Sweepstakes, see Hosting a raffle or sweepstakes on Zeffy.
For more detailed information on the regulations of each province or state, visit their respective websites.
🇦🇺 Australian organisations: Raffles are not currently supported or available for Australian users on Zeffy.
Step-by-Step Setup Guide
As you build your form, you can preview how it will look to your supporters on both mobile and desktop using the preview panel on the right side of the screen. Click Save & exit at any time to come back and finish later.
1) Start the campaign
From your Zeffy dashboard, click New campaign.
Select Raffle / Sweepstakes as the campaign type, then click Create campaign.
2) Pick Standard Raffle
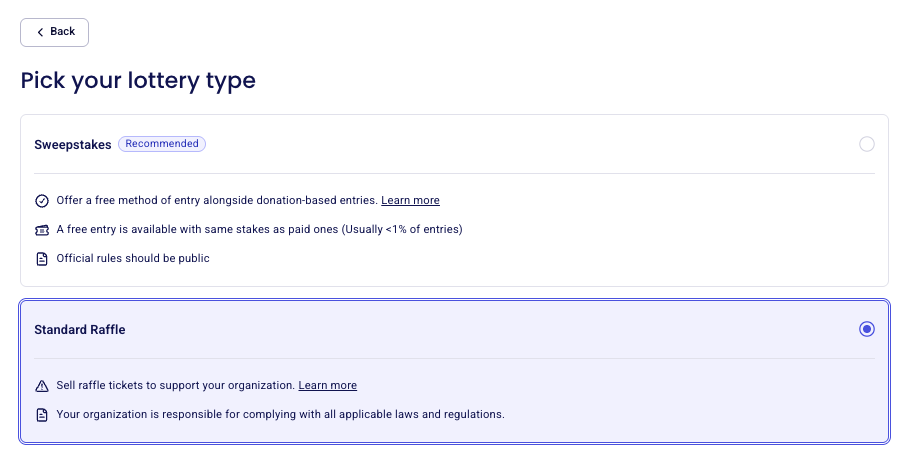
On the Pick your lottery type screen, you choose between Sweepstakes (selected by default and marked "Recommended") and Standard Raffle. Select Standard Raffle, then click Create raffle campaign.
Standard Raffle sells raffle tickets to support your organization, and your organization is responsible for complying with all applicable laws and regulations. Where online raffles are restricted, the screen tells you that the raffle is allowed in your state under restrictions that you need to verify: confirm the state regulations pop-up that appears.
3) Raffle Title
Enter your raffle title and choose a font style for it
4) Set Event Dates and Times
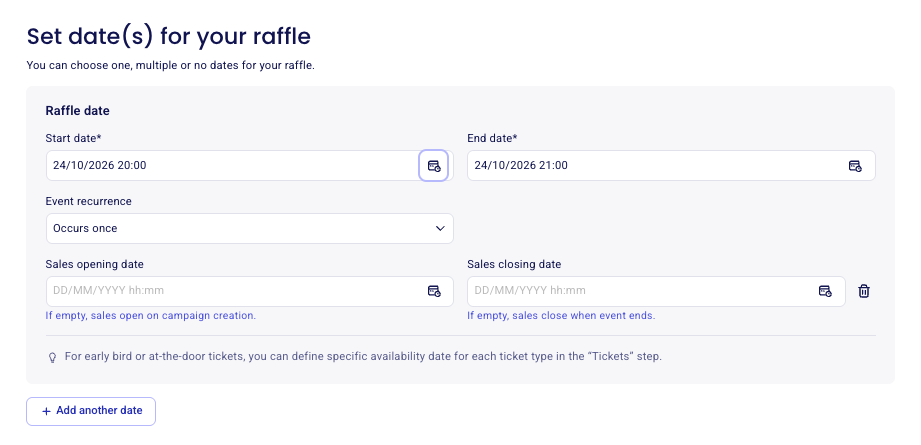
Set a Start date and End date for your raffle draw. Both lottery formats require a draw date.
You can choose one, multiple or no dates for your raffle. If you do not want to add a date, click on next at the bottom of the page without adding one
Set Event recurrence if your raffle occurs more than once. By default it occurs once.
Set a Sales opening date and a sales close date if you wish to open or close sales before your raffle start date. If you do not set a sales close date, sales will be closed automatically when your raffle starts
Click + Add another date if your raffle has multiple draws.
5) Customize Form Description
Add a detailed description of your raffle
Include important event details and what participants can expect
6) Form Design
In the color, banner and logo sections, you'll be able to customize the look of your form.
The color section will allow you to customize the color scheme of your Zeffy form - the color selected will also be the color your e-tickets are generated in
Upload your nonprofit's logo (it will appear in top left corner, next to your organization name) and then your banner (the main image of your form).
7) Configure Tickets
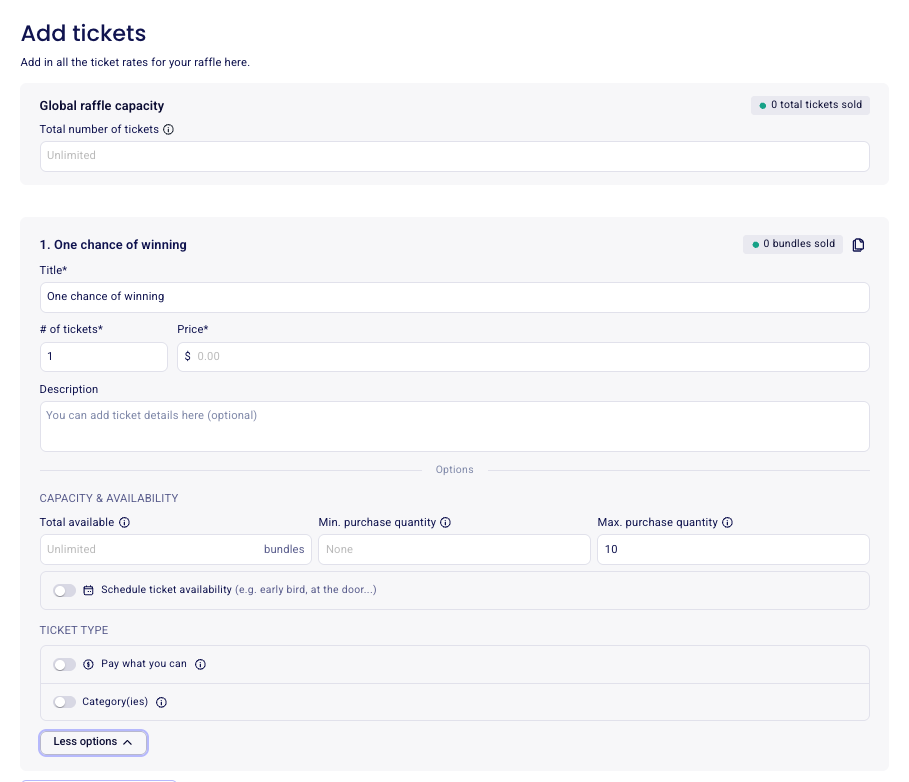
Global raffle capacity: set the total number of available tickets for your raffle (Optional. Leave it as "Unlimited" if you do not want a cap. To learn more about ticket limits, see Limit your ticket sales or set a maximum number of tickets)
Add different ticket types. For each one, fill in:
Title: the ticket name (e.g. General admission, day pass, family pass, etc.)
# of tickets: how many tickets the buyer gets (set this to >1 if looking to generate a bundle)
Price
Description: what the ticket includes (optional)
Click + Add another ticket rate to add more ticket types with their own ticket counts and pricing.
⚠️ More options: Click "See more options" below each item for more options:
Set a total availability: if you have limited quantities of this ticket type, you can set an upper limit for that ticket type.
Min. and Max. purchase quantity: limit how few or how many tickets a buyer can purchase of this ticket type.
Generate Tax receipts: if part of the ticket price is eligible for a tax receipt, you can check the option to generate a tax receipt and set the desired amount.
Pay What you can
Scheduled availability: if you want to sell some of your tickets at early bird pricing, you can set a date on which this rate will no longer be available for sale. You can also schedule ticket availability for at-the-door sales. To offer flexible pricing instead, set the rate as Pay what you can (PWYC).
Add categories: group your ticket types into categories so buyers can filter what they see on the form. See Create categories so buyers can sort your tickets and items. To send a discount code to a segment of your buyers instead, see Creating discount, coupon or promo codes.
8) Collect additional Information
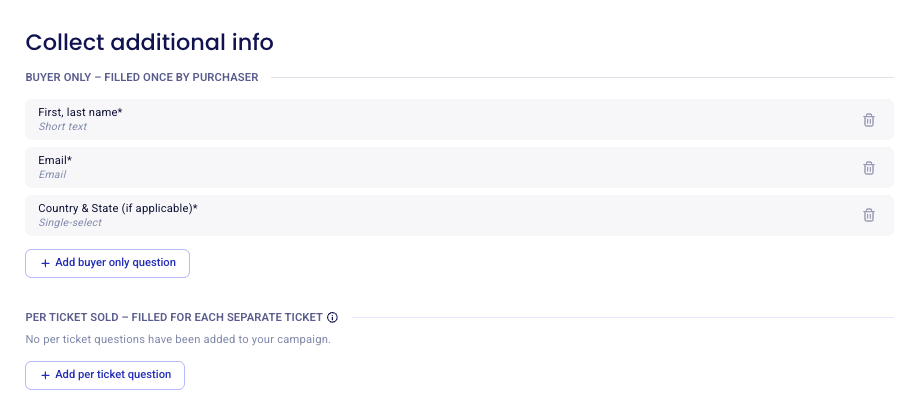
Buyer only questions are filled once by the purchaser. By default, the buyer will be asked for first and last name, Email, and Country & State (if applicable).
In the 'Per ticket sold' section, you can collect information for each individual ticket purchased. Any questions added here will be asked once for every ticket bought—so if someone purchases 10 tickets, they'll need to answer these questions 10 times.
Choose response formats (single select, multiple choice, checkbox, etc.)
💡To collect guest names, select the "Name" response format. The response entered in those fields will populate on e-tickets and on your guest list for easier reporting and attendance tracking. See Access and download your campaign guest list with answers to questions.
Set whether questions apply to all ticket types or specific ones
Make questions required if needed
Set maximum choice limits. Setting a maximum choice limit will limit the number of times this answer can be selected. The option will be greyed out when the limit is reached.
Standard Raffles require an "I confirm I am 18 or older" checkbox at checkout.
Question limits for multiple-choice questions
For multiple-choice questions, you can set a limit on how many times each answer option can be selected. You can use this feature to indicate how many meal options, clothing sizes, or spots in activities are available, for example!
To do this, choose multi-select or single-select as the question type. Then, click on "maximum choice limit" below the question. You can then enter the limit that corresponds to each multiple-choice answer in the field to the right. On the form, your buyers will be able to see how many of each selection are still available.
Questions only for specific tickets
You can click on "Ask for all ticket types" if you would like to ask the question for each ticket type. You can also specify which ticket rates you want this question to be asked for.
9) Collect Additional Donations
You can activate the option for buyers to add a donation to your organization and to generate a receipt for the additional donation if your account is configured to do so.
10) Add Discount Codes
Add discount codes with specific values and usage limits.
"Uses limit per date": If you are hosting an event with multiple dates and times, the code can be used the number of times indicated for each event occurrence. If you are hosting a single date event, the "per date" specification does not apply.
11) Customize your E-ticket
Customize your raffle tickets by adding a ticket banner, and check the live digital ticket preview. The e-ticket is automatically sent to buyers, and each ticket carries a unique number used to identify winning raffle tickets.
12) Customize your Thank You Email
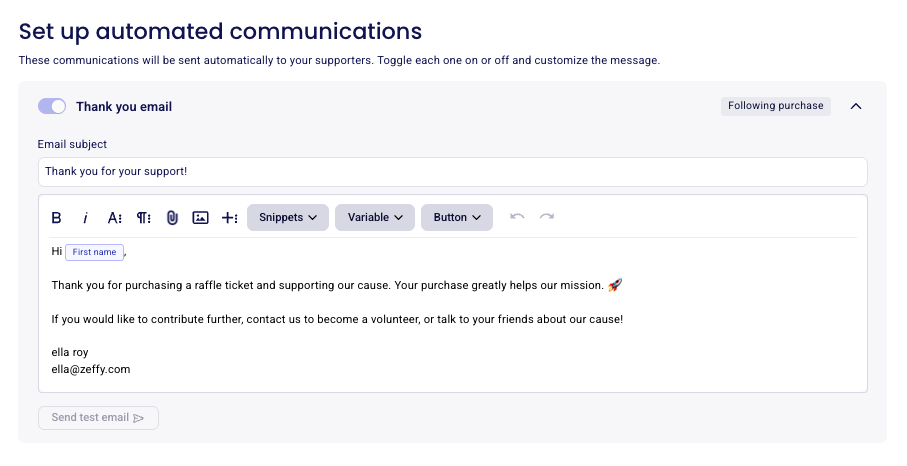
When a buyer completes their purchase, they are sent a confirmation email with their e-ticket(s), transaction receipt and a thank you message which you can customize in your form editor.
Configure thank you emails with:
Custom subject line and content
Variables for personalization
Buttons linking to other forms/campaigns
Image attachments
13) Advanced Settings
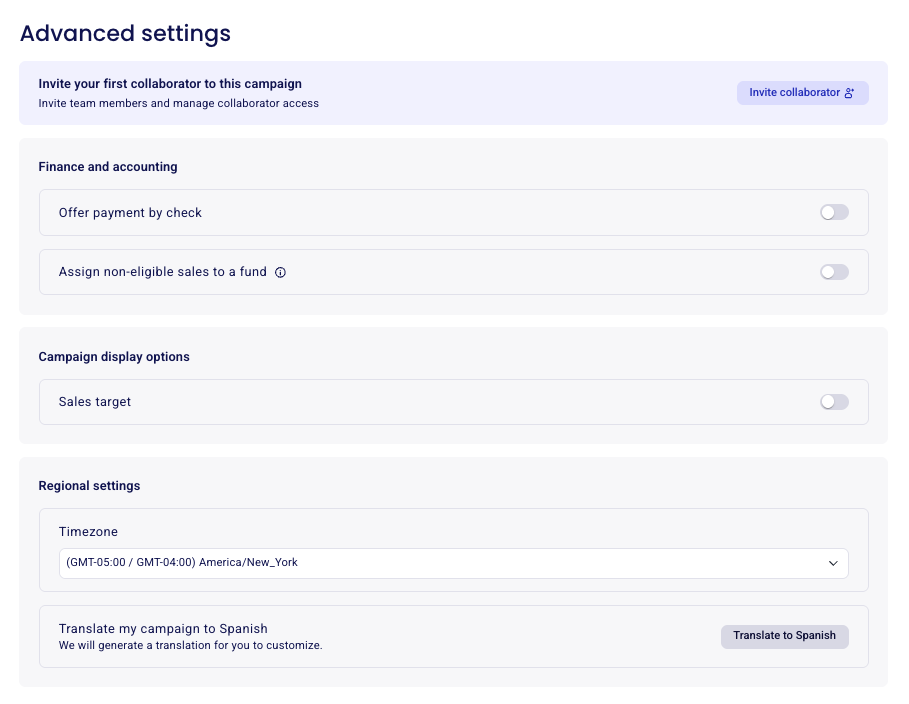
Add a campaign target thermometer to share your progress of your raffle sales
Enable check payments for amounts over $1,000. See Check payments: Enabling check as a payment method for how to log and track them.
Invite collaborators and set up notification emails for multiple team members. See User Roles, Permissions, and Account Ownership Transfers.
Enable form translation (Spanish for US, French for Canada)
14) Share your raffle
Once your form configuration has been finalized and you're ready for it to be publicized, you'll be able to share it with your community. To learn how to share your form, consult the instructions here: Sharing your Zeffy form.
🏆 Drawing a winner
Due to the raffle rules issued by the Gaming Authorities of each province or state, Zeffy doesn't have an automatic winner drawing tool. You can use the platform to sell tickets, but the draw needs to be done outside of the platform.
A random name picker is a great option if this meets the requirements of your state or province! For the steps, see Drawing a winner for your raffle.