
Set up automated emails for a newsletter sign-up form
Automations send a sequence of emails automatically to everyone who signs up through one of your sign-up forms. You build the sequence in the form builder's Set up automations step, choose an objective, and turn the workflow on.
Before you start
Automations currently work with sign-up forms only. Every contact who signs up through the form is enrolled automatically and starts receiving the emails in the flow. If you do not have a form yet, start with Create a newsletter sign-up form.
Open the automation builder
The automation lives in the last step of the sign-up form builder.
Go to Contacts > Sign-up Forms and open the form you want to automate.
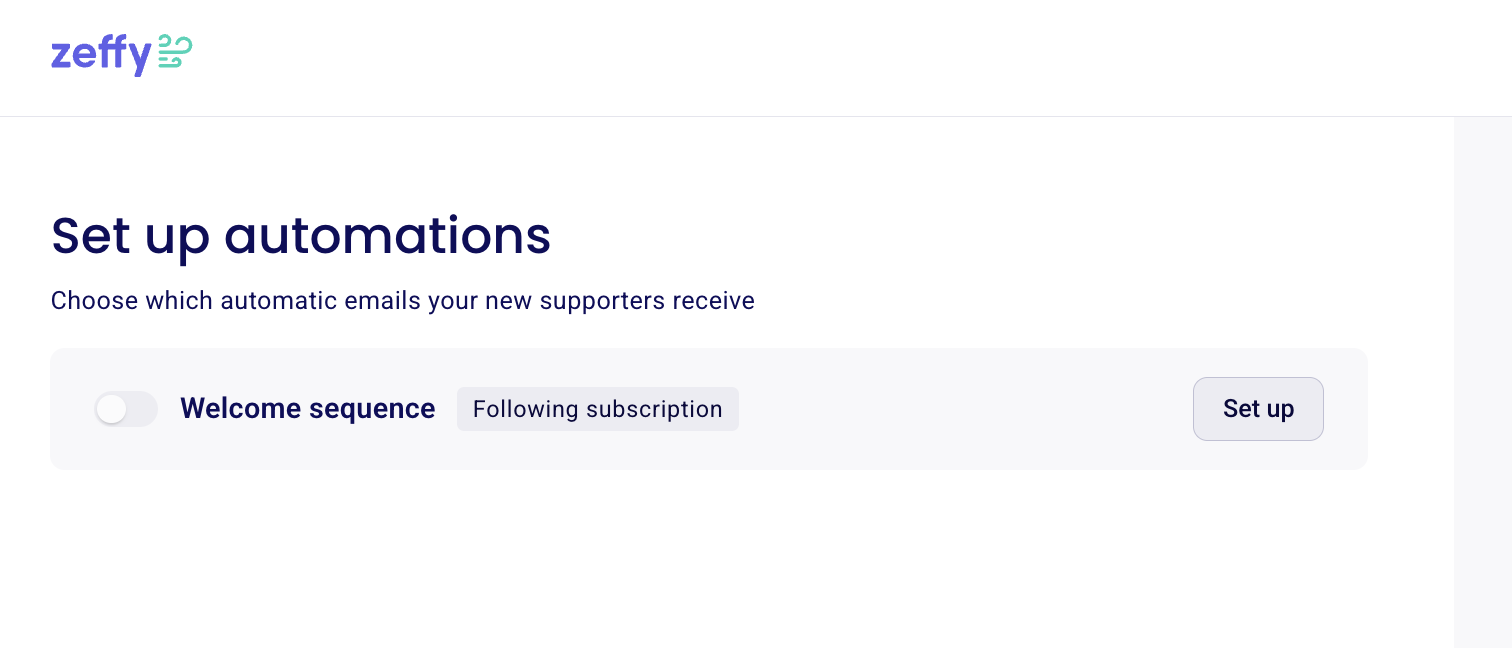
Go to the Set up automations step at the end of the form builder and click Set up.
When no automation is configured yet, Zeffy pre-configures one for you: an email, a time delay, then a second email. Zeffy names this pre-configured automation Welcome sequence.
Build your email sequence
The flow is a sequence of email steps and time delay steps.
Insert an email step and choose between a Designed email, built in the email builder, and a Simple email.
Click a time delay step to set how long to wait between two emails, in days or hours.
Add more emails or more time delays anywhere in the flow as needed.
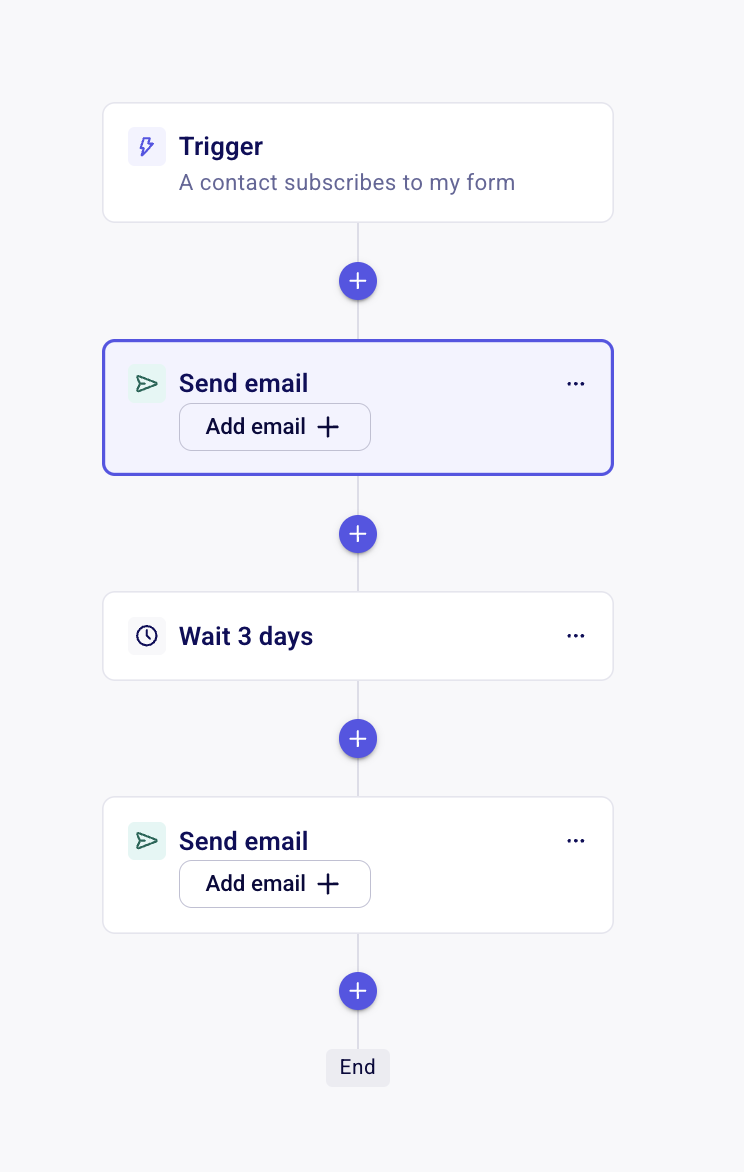
Every step must be fully configured before you can save. If a step is incomplete, Zeffy shows Almost ready - 1 email missing and the automation cannot be saved. Configure the step or delete it from the step's three-dot menu. Fully configured steps show a checkmark, and once every step is checked you can save the workflow.
Choose an objective
Every automation has one objective, chosen when you turn it on. As soon as a contact in the flow meets the objective, they exit the workflow and stop receiving its emails.
Click Review & Turn on at the top of the workflow editor.
In the Review and turn on automation window, choose the objective:
Makes a donation
Becomes a monthly donor
No objective
Leave Turn the workflow live switched on and click Save & turn on workflow.
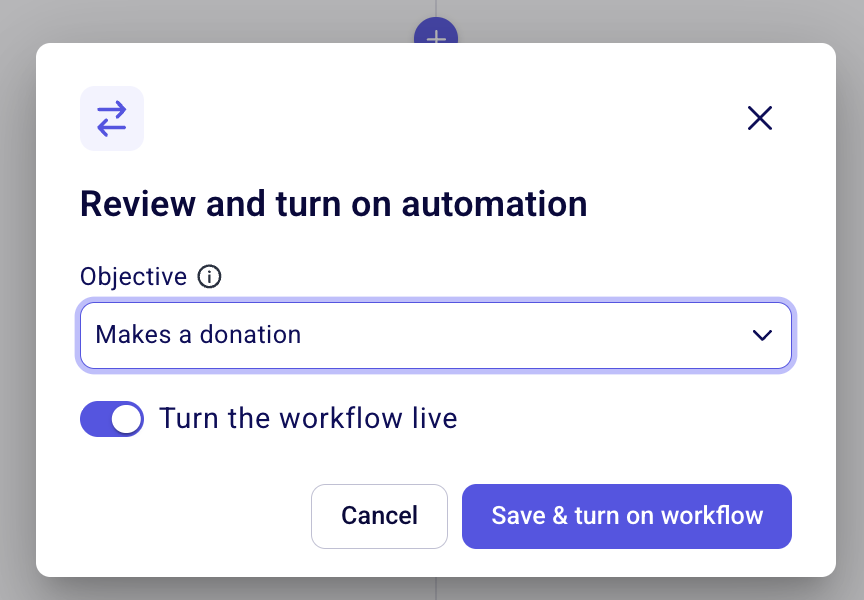
Turning the automation on activates it for everyone who signs up from now on. To save your workflow without turning it on, click Save & Exit; the automation stays in draft until you turn it on.
Pause, resume, or edit the automation
You can pause or unpause the automation both in the Set up automations step of the form builder and in the automation results view. The results view also offers Resume Automation and Edit Automation actions.
Track your results
Open the results of the automation linked to a sign-up form from the Automation column in the sign-up forms table.
Go to Contacts > Sign-up Forms.
Click the form's entry in the Automation column to open the results.
Review the overview metrics: Started, In the Flow, Completed, Unsubscribed, and Converted. Converted counts the contacts who entered the automation and met its objective.
Click an individual step to see detailed email delivery metrics for it, such as open rates, unsubscribes, and bounces.

Change the objective of a live automation
Changing the objective archives the current automation and creates a new one. Zeffy prompts you with a This will remove contacts in progress warning before the change.
The new automation keeps the same steps but uses the new objective.
Contacts who already entered or completed the old automation are not added to the new one.
The two automations run as fully separate workflows.
What to do next
Once your automation is running, reach subscribers outside the sequence with Sending emails and newsletters through Zeffy.