
Create a newsletter sign-up form
Use a newsletter sign-up form to collect new subscribers and add them to your contact database in Zeffy.
For a quick walkthrough of creating and embedding the form, watch this video.
Create the sign-up form
Log in to your Zeffy account.
Go to Contacts > Sign-up Forms.
Click Create Form.
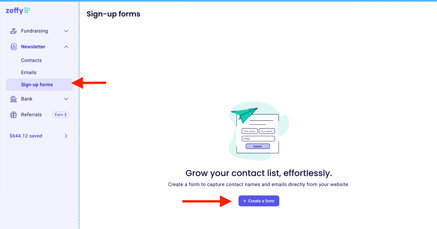
This creates a form you can share directly or embed on your website.
Customize your form
Add a clear title so supporters know what they are signing up for.
You can also update the form colors to match your branding and use the preview on the right side to review the layout as you make changes.
Enter the form title, such as Sign up for our newsletter or Stay connected.
Choose a background color with the color picker or by entering a hex code.
Choose a button color.
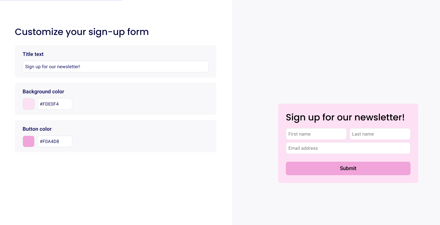
Use the preview on the right side of the page to check how the form looks as you make changes.
Choose the fields and lists
Your sign-up form includes first name, last name, and email address fields by default.
You can also add other details you want to collect from subscribers, such as name and address.
After you finish the design step, click Next to configure lists for new subscribers.
Review the suggested list for new subscribers.
Keep it, remove it, or add a different list.
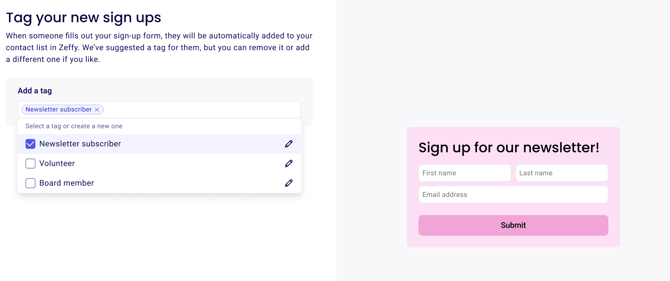
When someone submits the form, they are added to your contact list with the selected lists.
Automatically organize subscribers into a list
If you want all sign-ups to be grouped together for later emailing, create or select a manual list during setup.
Choose Create a new manual list.
Give the list a clear name, such as Newsletter Subscriber List.
Use the checkbox to automatically add newsletter sign-ups to that list.

Subscribers added through the form also appear in Contacts. The list gives you an easy way to email this group again later.
Share the hosted form
Use the direct link when you want to share the form without embedding it on a website.
Open Share.
Select Stand-alone page or Share Link, depending on the wording shown in your account.
Copy the generated URL.
Share it in social posts, email signatures, marketing materials, or newsletters.
Embed the form on your website
Use the embed option if you want visitors to subscribe without leaving your site.
Click Share.
Select Embed.
Copy the embed code.
Paste the code into your website HTML where you want the form to appear.
For the same embedded form walkthrough in a shareable video link, see this Loom video.
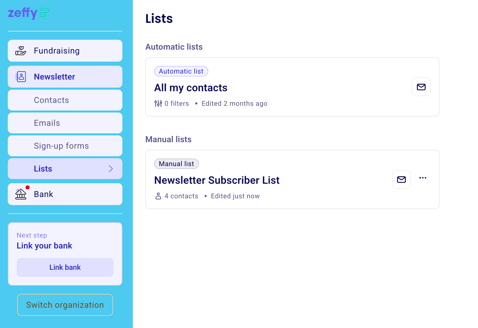
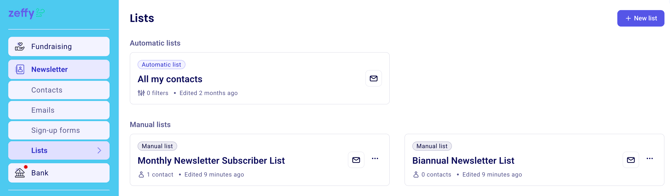
Find and use your subscriber list
Go to Contacts > Lists.
Find the subscriber list you created.
Open the list when you are ready to review or email that audience.
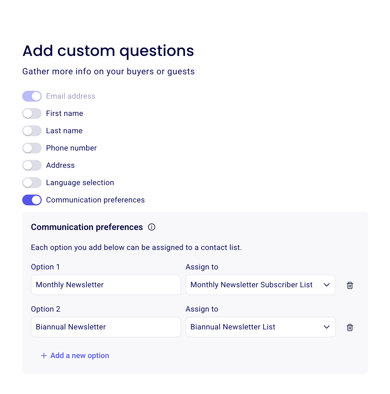
Optional: Create lists based on communication preferences
If you want subscribers to choose the type of updates they receive, add a communication preferences question to the form.
Add the Communication Preferences question.
Create an option such as Monthly Newsletter.
Use the Assign to menu to create a new list for that option.
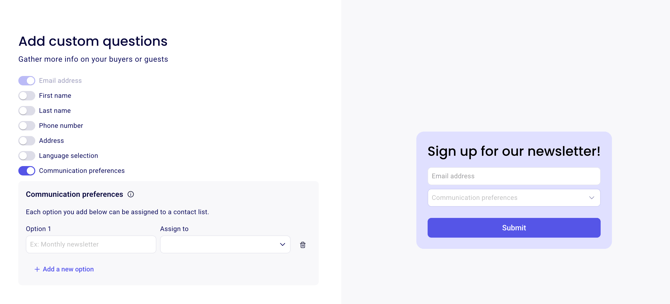
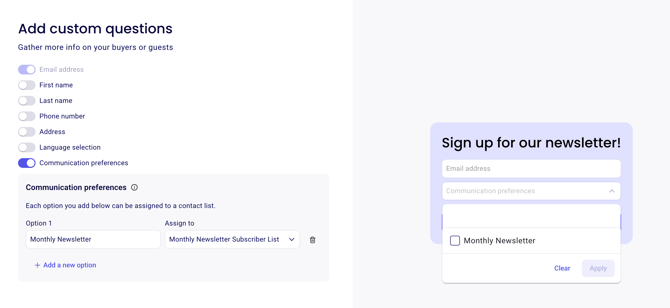
If you offer more than one option, click Add a new option and repeat the same setup for each list.
What to do next
Once subscribers start coming in, organize them with Create lists and segments and reach out with Send emails to contacts.