
Import contacts into Zeffy
Use this article to import existing contacts into Zeffy, including names, email addresses, phone numbers, addresses, preferred language, notes, tags, and company names.
If you want a walkthrough before importing, watch the video below.
Start a contact import
Log in to your Zeffy account and go to Contacts.
In the top right, click Add contact.
Select Import contacts.

The contact import limit is 10,000 records per file. If you need to import more, split your spreadsheet into multiple files first.
Choose how to import contacts
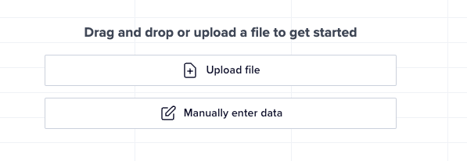
When you select Import a file, you can either upload a file or manually enter data in Zeffy's workbook.
Import contacts with a file upload
If you already have your contacts in a spreadsheet, use the upload option.
Start from the contact import template if you need the correct structure.
Select Upload file.
Choose your .xlsx file from your device.
Wait for the Job completed status and upload success message.
Review the mapping between your spreadsheet columns and the destination fields in Zeffy.
Click Continue.
Review the final mapped workbook, then click Submit.
After the import finishes, you are redirected to Contacts and a confirmation message appears.
Imported contacts are automatically tagged using the format Import [month/day/year] so you can find that batch again later.
Available fields for mapping
Zeffy supports the following contact fields during import.
First Name
Last Name
Email
Language with supported values EN, FR, or ES
Address
City
Region
Postal Code
Country with supported values CA or US
Phone
Note
Tags
Company name
Custom fields are not available on contact pages. Only import data that matches Zeffy's available fields.
Prepare your spreadsheet correctly
Keep first names and last names in separate columns. Zeffy cannot split combined name data after upload.
Email is the primary identifier for a contact in Zeffy. Add one email address per contact whenever possible.
If the same person uses more than one email address, importing both can create duplicate contacts. If needed, add an alternate email in the Note field instead.
The Note field is an open text field for contact-specific comments.
Tags help you segment contacts later and create mailing lists. Every imported contact also receives an import-date tag automatically.
Manually enter contact data
If you do not want to upload a spreadsheet, choose Manually enter data to work directly in Zeffy's embedded workbook.
All workbook fields are optional.
While email is not required, it is still the primary contact identifier in Zeffy. If you import a contact without an email and that person later completes a Zeffy transaction with an email address, Zeffy can create a duplicate contact record.
The workbook highlights formatting errors in red.
Enter the contact data in the workbook.
Review any highlighted errors.
Click Submit in the top right.

After the import finishes, you are redirected to Contacts and a green success message appears.
Paste email addresses into Zeffy
If you only need to import email addresses, use the paste option.
This method only imports email addresses. Other contact details must be added later on each contact profile if needed.
What to do next
After your contacts are imported, organize them with Create lists and segments or send an email with Send emails to contacts.