
Sending emails and newsletters through Zeffy
Use this article to send an email to all contacts, a saved audience, a filtered segment, or an individual contact in Zeffy.
Before you can edit, send, or schedule emails, you may need to link your bank account and verify your email address. See How to validate or verify your email address to send and edit emails in Zeffy.
General notes about sending emails in Zeffy
You can include up to 5,000 contacts on one email at a time, or connect your custom domain to Zeffy to email up to 30,000 recipients
Emails sent to more than one contact use BCC so recipients do not see each other.
If you do not customize your domain, the sender email on these messages is always [email protected].
The reply-to address can be customized in the email settings
You can customize the sender name while composing the email.
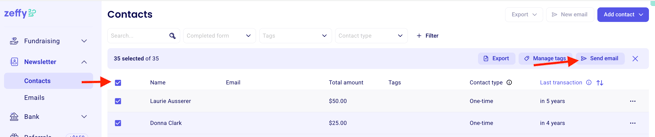
Send an email to all contacts
Log in to Zeffy and go to Contacts.
Select the checkbox at the top of the contact list to select all contacts.
Click Send email.
The email composer opens on the right so you can write your message.
Send a test email or click Send to deliver it to your contacts.
Review the email results later in the Emails area.
Send an email to a segment of contacts
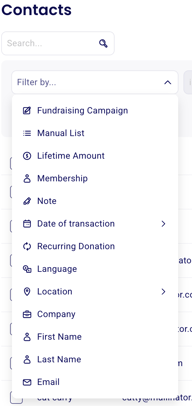
Use filters when you only want to email part of your contact database.
Go to Contacts.
Click + Filter.
Choose the filter options you want to use.
Apply the filter.
Select the contacts in the filtered results using the checkbox at the top of the name column.
Click Send email.
Write your message and send a test email or send it to the selected contacts.
Review the email results in the Emails area after sending.

To learn more about building filtered audiences, see Create lists and segments.
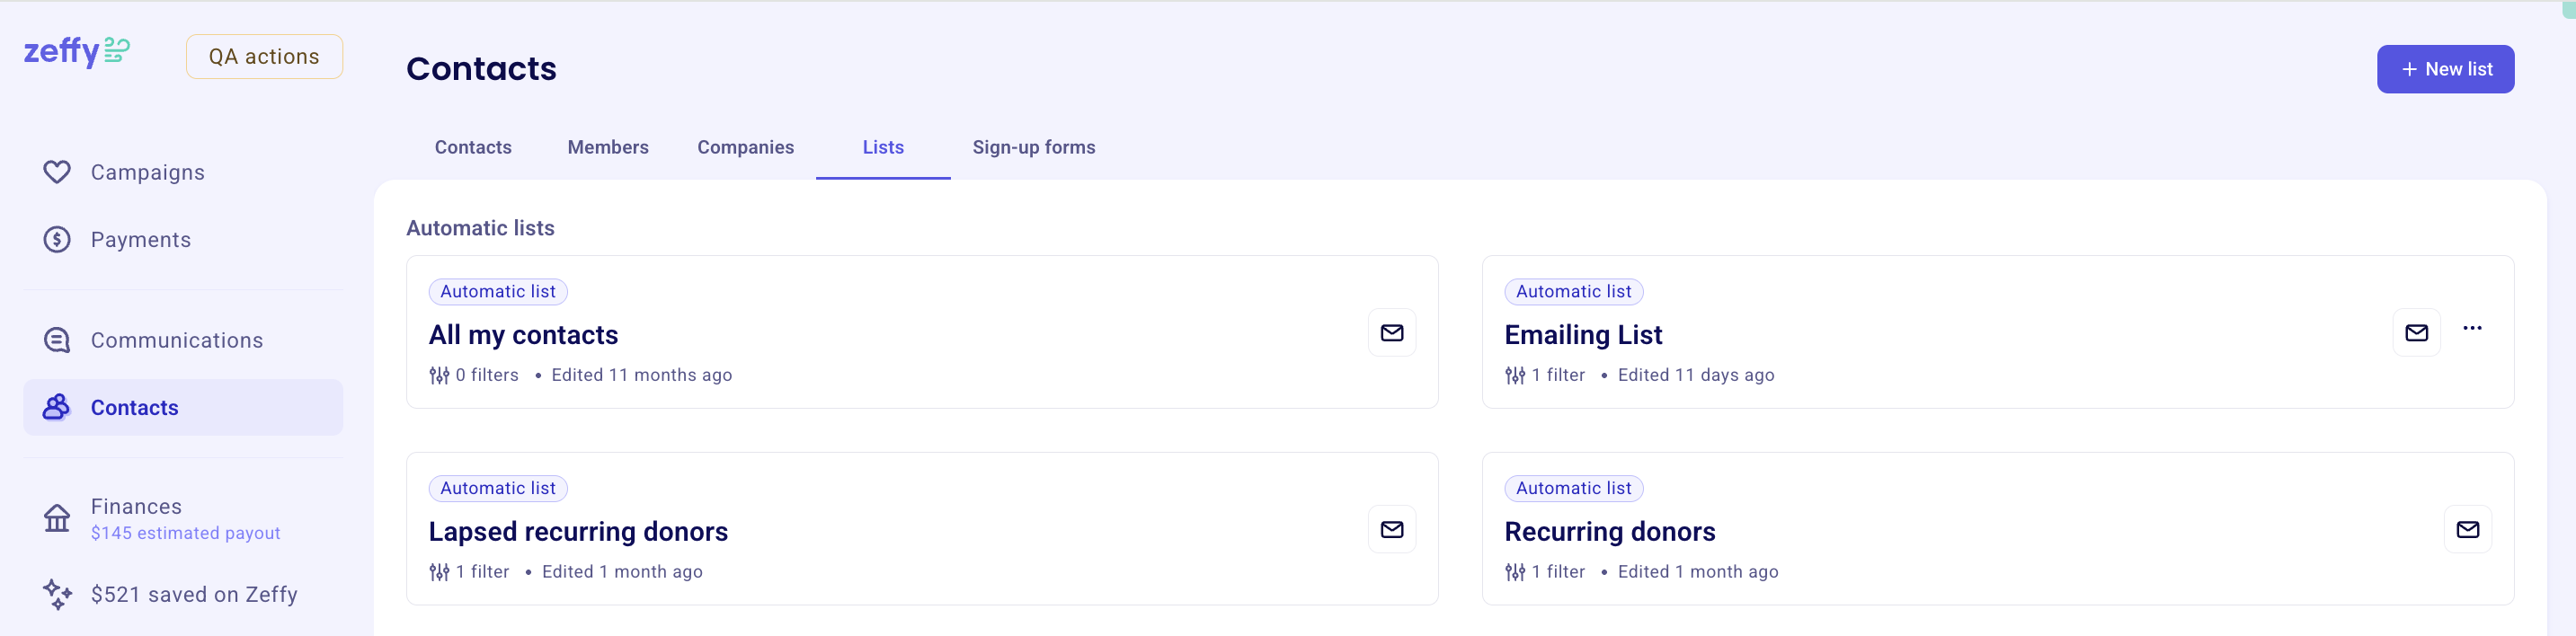
Send an email to a saved list
If you regularly email the same group of contacts, use a saved list instead of applying filters each time.
Go to Contacts > Lists.
Open the list you want to email.
Click Send email to message everyone in that list.
To learn more about creating and managing lists, see Create lists and segments.
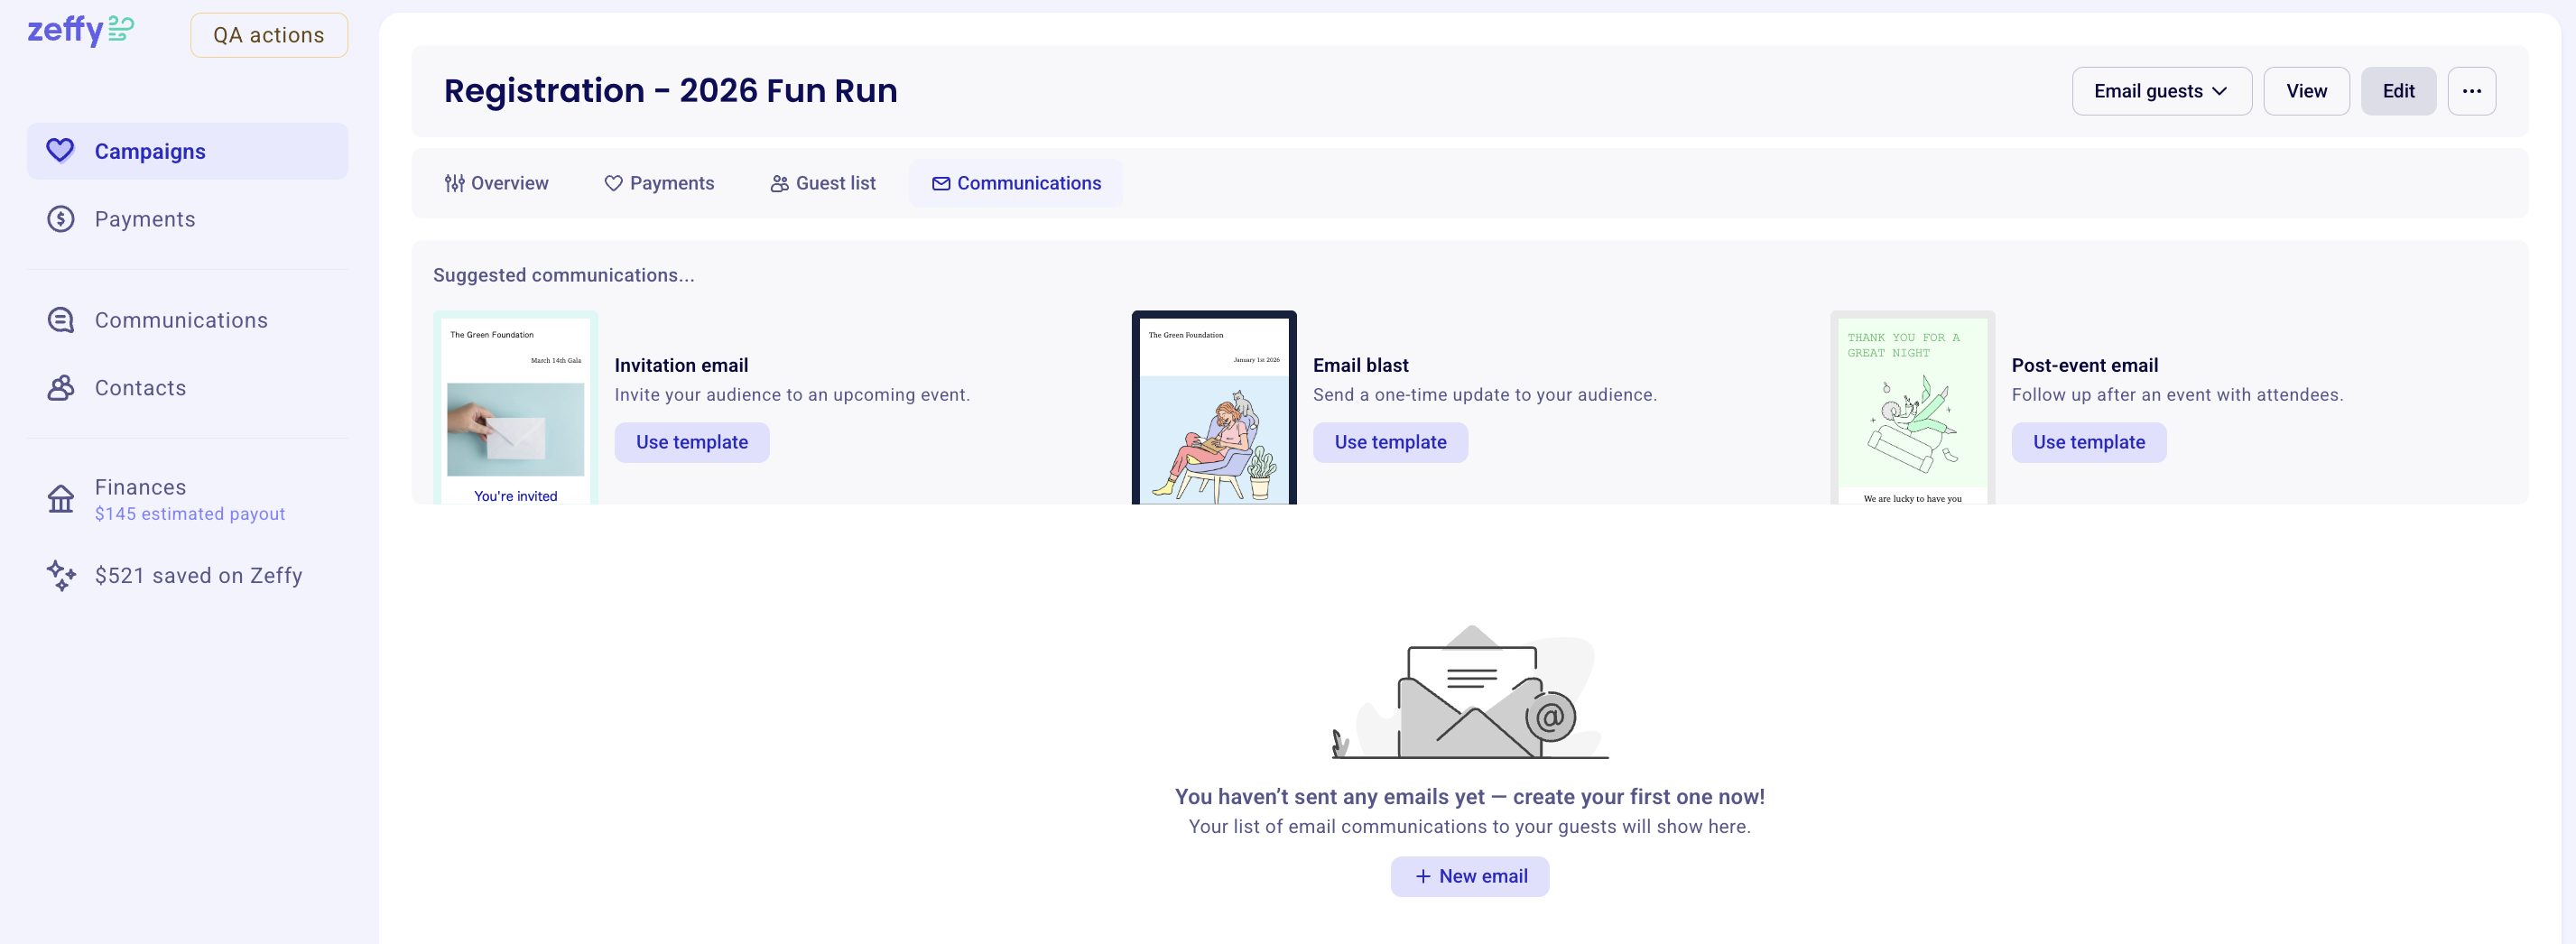
Schedule emails to campaign supporters
Every Zeffy campaign has a Communications tab that you can use to schedule messages for supporters.
Go to Campaigns.
Open the campaign you want to manage.
Open the Communications section.
Use the available options there to schedule the message.
If you need campaign-specific communications rather than contact-list emails, use that campaign workflow instead of the main Contacts email flow.
Send an email to one contact
You can also email a single contact directly from their contact profile.
To reuse message text on one-to-one emails, save a snippet—see Email templates and snippets for how snippets differ from bulk email templates.
Go to Contacts.
Search for the contact and open their profile.
Click New email in the top right.
Write your message in the side panel or select "Snippets" > "Your snippets" to use a contact snippet
Send a test email or click Send.
Review the result in the Status section of the contact profile.


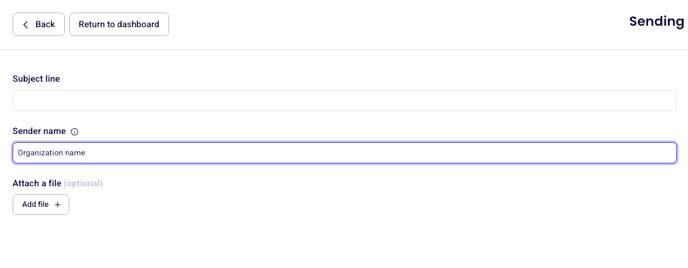
Write your email
Compose your message in the email editor. Add your subject line, sender details, and content before you move to the send step.
For design help, see Designing emails with Zeffy’s email builder and templates. For the difference between bulk email templates and one-to-one snippets, see Email templates and snippets.
Add attachments
Zeffy supports one attachment per email, with a maximum file size of 20 MB.
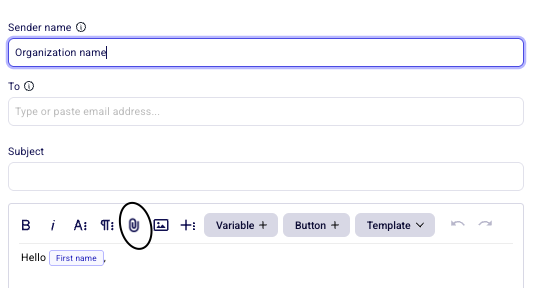
Attach a file from the email builder
After designing your email in the builder, click Next.
In the sending preferences panel, click Add file.
Select the file from your device.
Continue to choose recipients and send, schedule, or save as draft.
Attach a file from the contact page composer
Open a contact profile and click New email.
In the message panel, click the attachment icon.
Upload the file from your device.
Write your message and send.
Choose the right reply-to email
The sender email on manual and scheduled emails is always [email protected], but replies go to the reply-to address tied to the person sending the message.
For manual and scheduled emails, the reply-to is the sender who clicks Send or Schedule.
Review the reply-to field before you confirm the send so replies go to the right person or team inbox.
Send, draft, test, and schedule
After choosing recipients, you can send the email right away, save it as a draft, schedule it for later, or send a test email first.
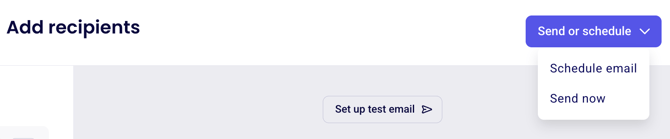
Send now
Click Send now to deliver the email immediately to the selected recipients.
Save a draft
Emails save automatically while you work, so you do not need to click Save. You can find drafts in the Draft section of the Emails tab.
Schedule for later
After choosing recipients, you can set a future date and time for the email. Confirm the schedule to save it.
Send a test email
Use a test email to review the message in your inbox before sending it to recipients. You can also use Preview to check the layout while you build the message.
Manage unsubscribes and recipient settings
Contacts can unsubscribe from email communications when unsubscribe options apply to the message type. Review your audience carefully so the email reaches the right group.
What to do next
After you send, review the results in Track email performance.