If the email builder in your Zeffy account looks different from the screenshots in the visuals below, this means you are on Zeffy's new version of the builder which we are gradually rolling out. Please refer to this guide instead.
To learn how to import your contact list from your existing newsletter tool, consult this video.
To learn how to send emails to all or a segment of your contacts, consult this article.
Step 1: Access the Editor
- Log into your Zeffy account
- Click the Communications section in the left-hand menu
- Click New Email in the top right corner
Step 2: Choose Your Starting Point
-
Start with a Template:

- Click the Template button
- Select Zeffy templates
- Choose from options like:
- Newsletter templates
- Fundraising appeals
- Event recaps
- Invitations
- Follow-up templates
-
Start from Scratch:
- Design your own layout and save it as a template so you can use it in the future!
Step 3: Build Your Newsletter Content
-
Add Content Elements:

- Click Content section
- Add elements by dragging and dropping:
- Text boxes
- Headings
- Images
- Buttons (for donation forms or event links)
- Dividers
- Social media icons
- Videos
- HTML content
🌟 When you include a Zeffy form link in an email created with our email builder Zeffy automatically appends each recipient’s information—such as name, email address, and mailing address—to every Zeffy link. This means donors are recognized when they click through and can complete their donation or registration more quickly. No additional setup is required on your part; this enhancement is applied to all Zeffy links by default.
-
- Click Blocks section
- Choose your layout:
- Full-width blocks
- Two-column layouts (50-50 split)
- Other custom arrangements
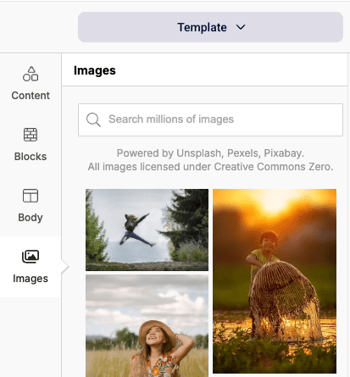
- Click Images section
- Either:
- Search for images using keywords
- Upload your own images
- Either:
- Drag selected images into your newsletter
Step 4: Customize Design
- Select your font style
- Choose text colors
- Set background colors
- Adjust content width
- Align content
- Customize other typography settings
Step 5: Personalize Your Content
- Use variables for personalization:
- First name
- Last name

- Add your organization's branding
- Include relevant links and calls-to-action
Step 6: Mobile Optimization
- Click the mobile preview option

- Review how your newsletter looks on mobile devices
- Make adjustments if needed
Step 7: Prepare for Sending
-
Click Next in the top right corner

-
Set up sending details:
- Write your subject line
- Set sender name (visible to recipients)
- Note: Replies will go to your Zeffy account email
-
Add recipients:
- Select from Zeffy contacts
- Import from MailChimp or Gmail (You can find instructions for this here: Importing contacts into Zeffy)
- Add file attachments
- Please note that the maximum file size is 20MB.
Step 8: Test and Send
- Click "Send Test Email" to preview
- Review:
- Layout
- Links
- Content
- Personalization
- Make any final adjustments
- Send to your recipient list OR schedule it to send at a later time

Pro Tips
- Save your custom designs as templates for future use
- Keep your layout clean and organized
- Use images thoughtfully
- Test all interactive elements before sending
- Monitor newsletter performance in the Emails section
Remember: After sending, you can track opens and clicks through the Emails section of your Zeffy account.