Filtering Your Contact List
Getting Started
Navigate to Contacts in your Zeffy dashboard.
Click the + Filter option next to the search bar.
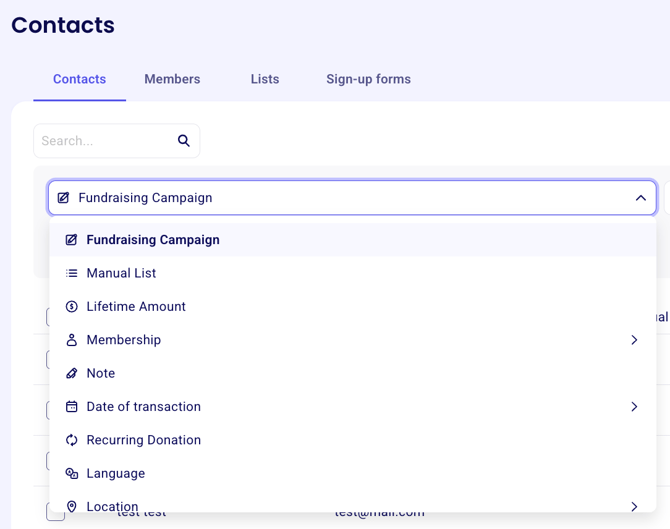
Available Filter Types
Filter | What It Does |
|---|---|
Fundraising Campaign | Filter contacts by a campaign they have completed |
Manual List | Filter contacts by a list they've been added to |
Lifetime Amount | Filter by the total amount a contact has donated |
Membership | Filter by membership type, status, and more |
Note | Filter by notes on a contact's donor page |
Date of Transaction | Filter by the date of a contact's last, first, or any transaction |
Recurring Donation | Filter by recurring donation status or conditions |
Language | Filter contacts by their language |
Location | Filter by state/province, address, or country |
Company | Filter by the company a contact is associated with |
First Name | Filter by first name |
Last Name | Filter by last name |
Filter by email address |
Setting Filter Conditions
Each filter type comes with its own set of conditions which you can customize by selecting from the options in the middle field. Here are some examples:

Fundraising Campaign
Is — the contact has completed this campaign
Is not — the contact has not completed this campaign
Lifetime Amount
Is more than
Is less than
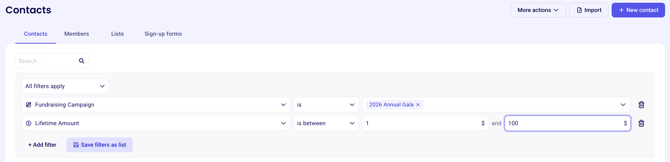
Is between
Is / Is not
Date of Transaction (last, first, or any transaction)
Is after
Is on
Is before
Is between
Recurring Donation (filter by frequency)
Is
Is cancelled
Is past due
Is not
Note
Contains
Does not contain
Is known
Is unknown
Location
Search by state or province, full address, or country
Company
Search by company name to pull up all contacts associated with that company
Applying Multiple Filters
You can stack filters to get more specific results.
Apply your first filter.
Click + Filter again to add a second filter.
Choose how you want your filters to interact:
All filters apply — shows contacts who meet every filter condition
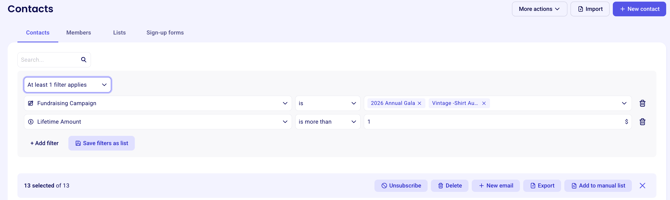
At least one filter applies — shows contacts who meet any one of the filter conditions
To remove a filter, click the trash icon next to it. You can also change your filter conditions at any time.
Saving Filters as a List
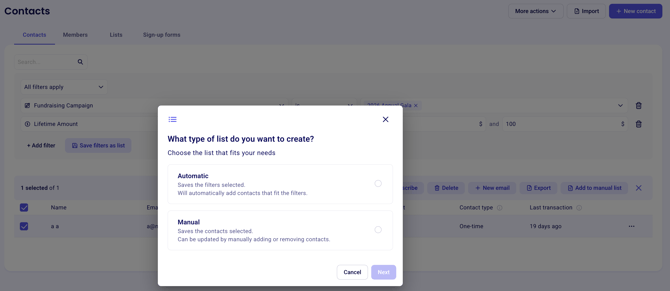
Once you've set up your filters, you can save them for ongoing use by clicking "Save filters as list"
Save as a dynamic list — contacts are automatically added to this list whenever they meet the filter conditions
Save as a manual list — a static snapshot of the contacts who currently match your filters
Taking Action on Filtered Results
When your filters are applied and you're ready to act:
Click Select All — selected contacts will be highlighted in purple.
From there, you can:
Export the contact list
Send an email to all selected contacts
Delete all selected contacts
Unsubscribe all selected contacts from emails
Add all selected contacts to a manual list