
Access and download your campaign guest list with answers to questions
What is the guest list?
The guest list is a section of the campaign manager dedicated to managing attendees and tracking attendance. It displays:
Key information about each guest, including ticket status and responses to any custom questions collected at checkout.
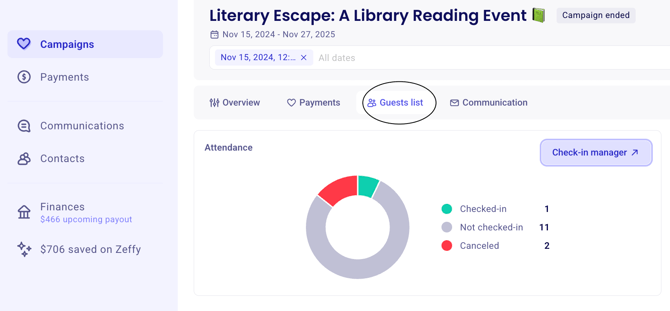
A real-time snapshot of event attendance, allowing you to see how many guests have checked in, whether via QR code scanning on e-tickets or the online check-in manager, during and after the event.
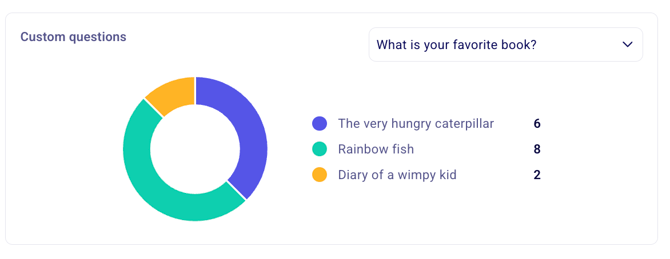
A visual breakdown of custom question responses, with a graph on the left-hand side of the guest list indicating how many times each answer choice was selected.
From this page, you can:
Filter your guest list by: ticket type, ticket status and answers to custom questions.
Send an email to all or a subset of your guests
Access your check-in manager or download a list of your guests
Manage guests: change their ticket status, add notes to their ticket which can be accessed at check-in (e.g. table assignation, special mentions) or add a new guest to your list
How to access the guest list:
Login to your Zeffy account
Navigate to the "Campaigns" tab in the left hand menu.
Click on the three dots to the right of the campaign in question and select "Manage event"
Click the "Guest list" tab at the top of the page to see all guests, ticket information, answers to custom questions and the status of their ticket.
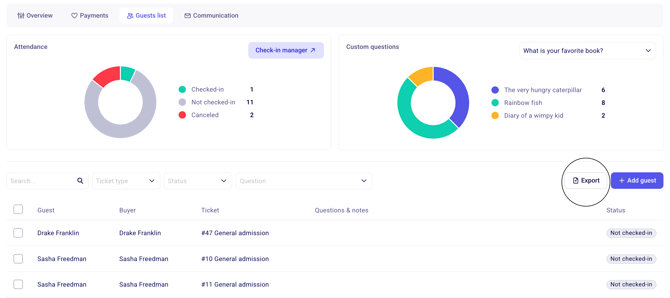
If somebody bought multiple tickets in one transaction, each of the guests will be listed on separate lines and the buyer's name will be listed in the "Buyer"list
Access the check-in manager or print the guest list
To use the online check-in manager:
The check-in manager is a list of your guests that is accessible online that can be used to check people in as they arrive to the event. The link to the check-in manager can be shared with anyone from your organization who will be managing attendance.
↗️ Learn more about the check-in manager
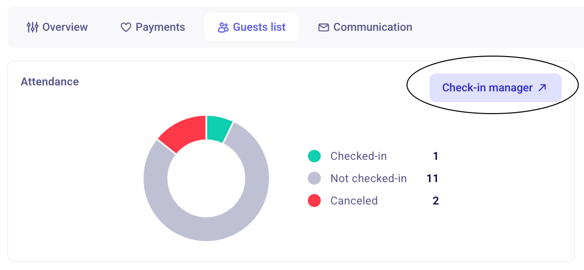
To access the online check-in manager, click the "Check-in manager" button that is available in the top right hand corner of the Attendance box.
To download or print a physical list of your guests:
To download your guest list, click the "Export" button found above the list of guests.
If you have an event with multiple occurrences, make sure to apply the date filter at the top of the page to export the guests for specific dates of your event

Before exporting, you can choose to export the file as an Excel spreadsheet or a PDF document (ideal for printing). You can also customize the columns included in this report.
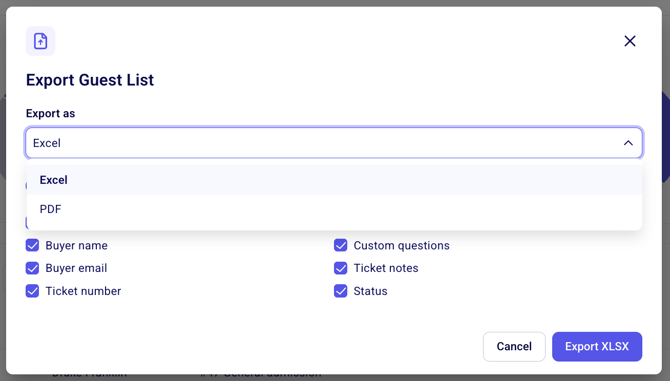
The PDF export is designed to support event management needs, allowing you to write directly on the printed copy—ideal for checking in guests or recording additional notes onsite. For those who prefer working digitally, Excel version provides a dedicated notes section where you can enter and update information as needed.
E-mail all or a subset of your guests
To email all or a subset of your guest
Scroll down to your list of guests
Apply any relevant filters (e.g. specific ticket type, status, answer to a custom question)
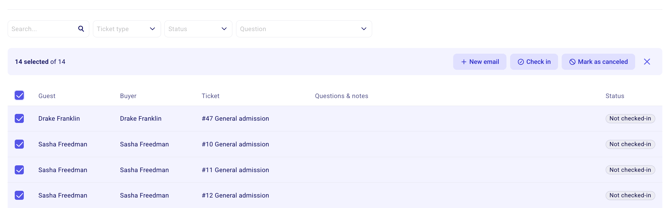
Select all guests by checking the box at the top of the list, or select guests manually by checking the box next to their name
Select the "New email" option that appears at the top, after you make your selection
Change a guest's ticket status or add a note to their ticket
To change a guest's ticket status:
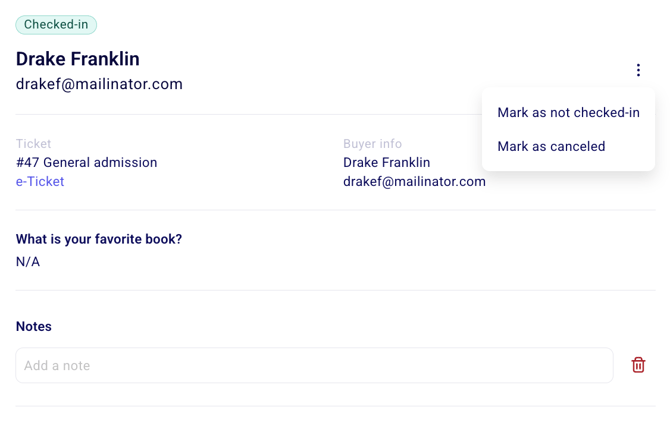
Use the search bar to find their ticket and click on their name. A page will open to the right with their ticket details.
Click the three dots next to their name to view the options to either "Mark as checked-in," "Mark as not checked-in," or "Mark as canceled." The status will be updated immediately
To add a note, click the "+" button next to the Notes line
Add a new guest to the list
To add a guest manually from the guest list, open the Add a guest drawer and enter their details. The new guest will appear on the list immediately and can be checked in or emailed like any other attendee.
