
Setting up an event with multiple dates and times
Configure an event form with multiple occurrences
This feature is ideal if you are selling tickets to shows, museum visits, performances, classes, or any other type of event that occurs more than once.
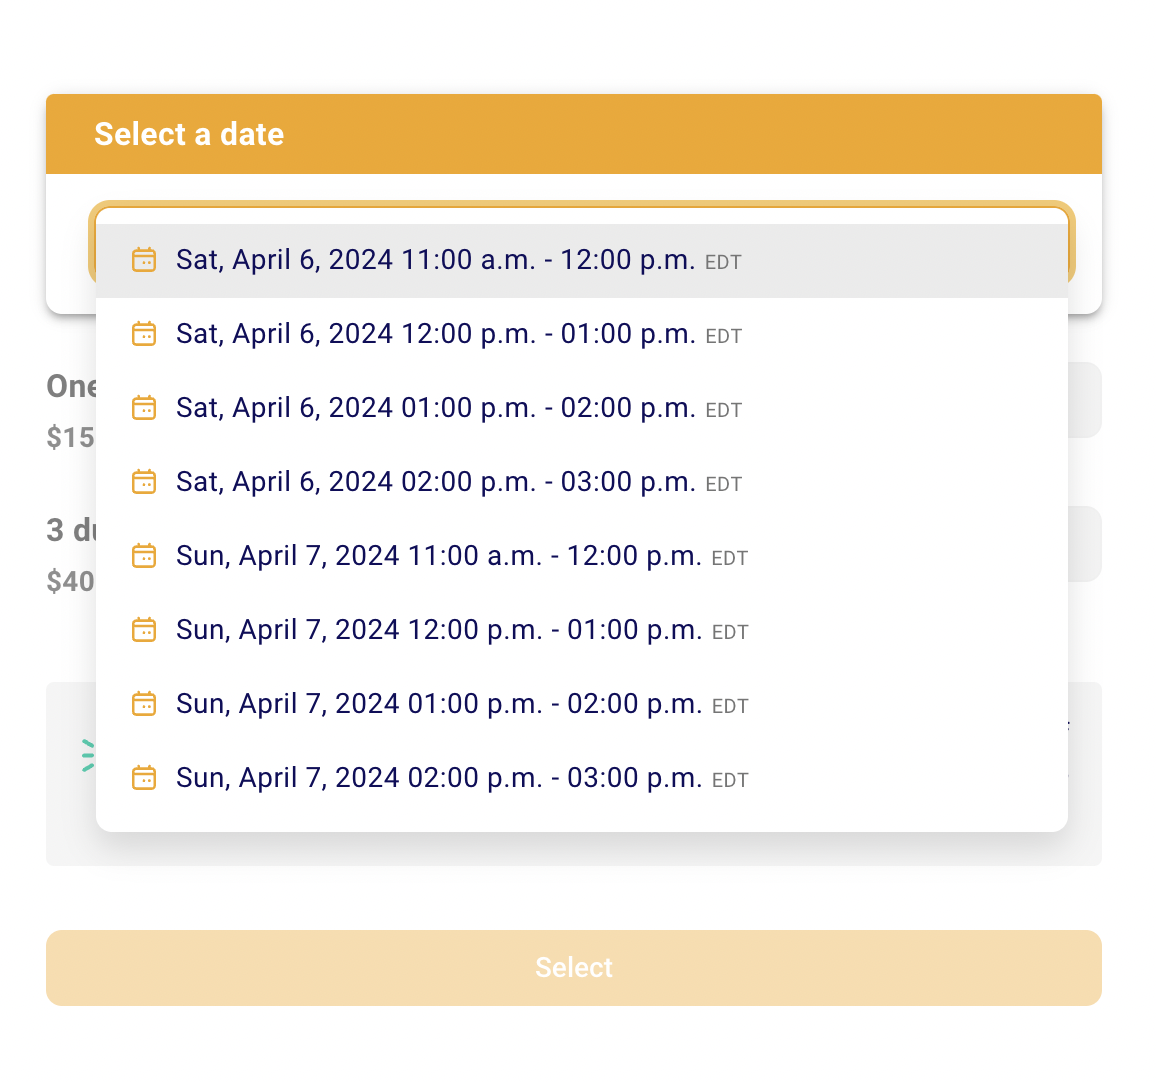
When you configure a multi-date event, your ticket buyers will first choose the date and time they wish to attend and then move onto the ticket selection process.
The information for each date and time added is exactly the same across all occurrences - it isn't possible to have ticket variations across dates or different information for different dates.
Here is what they will see when they arrive on the form:
Here are the steps to follow to set up your form:
Start in the "Campaigns" section of your account and click on "New campaign" button in the top right to create a new campaign (or click on edit to the right of your existing event)
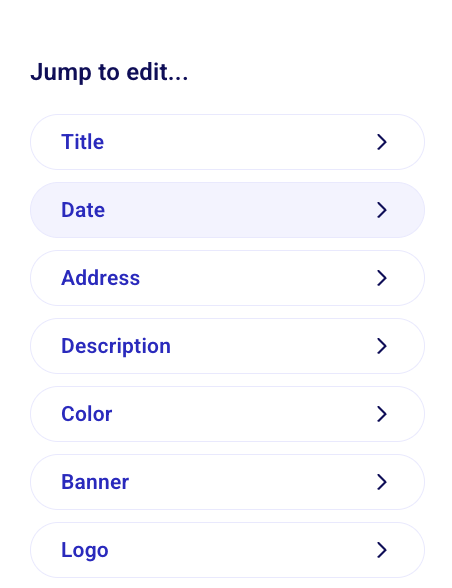
Go to the "Date" section
There, you'll be able to your event occurrences
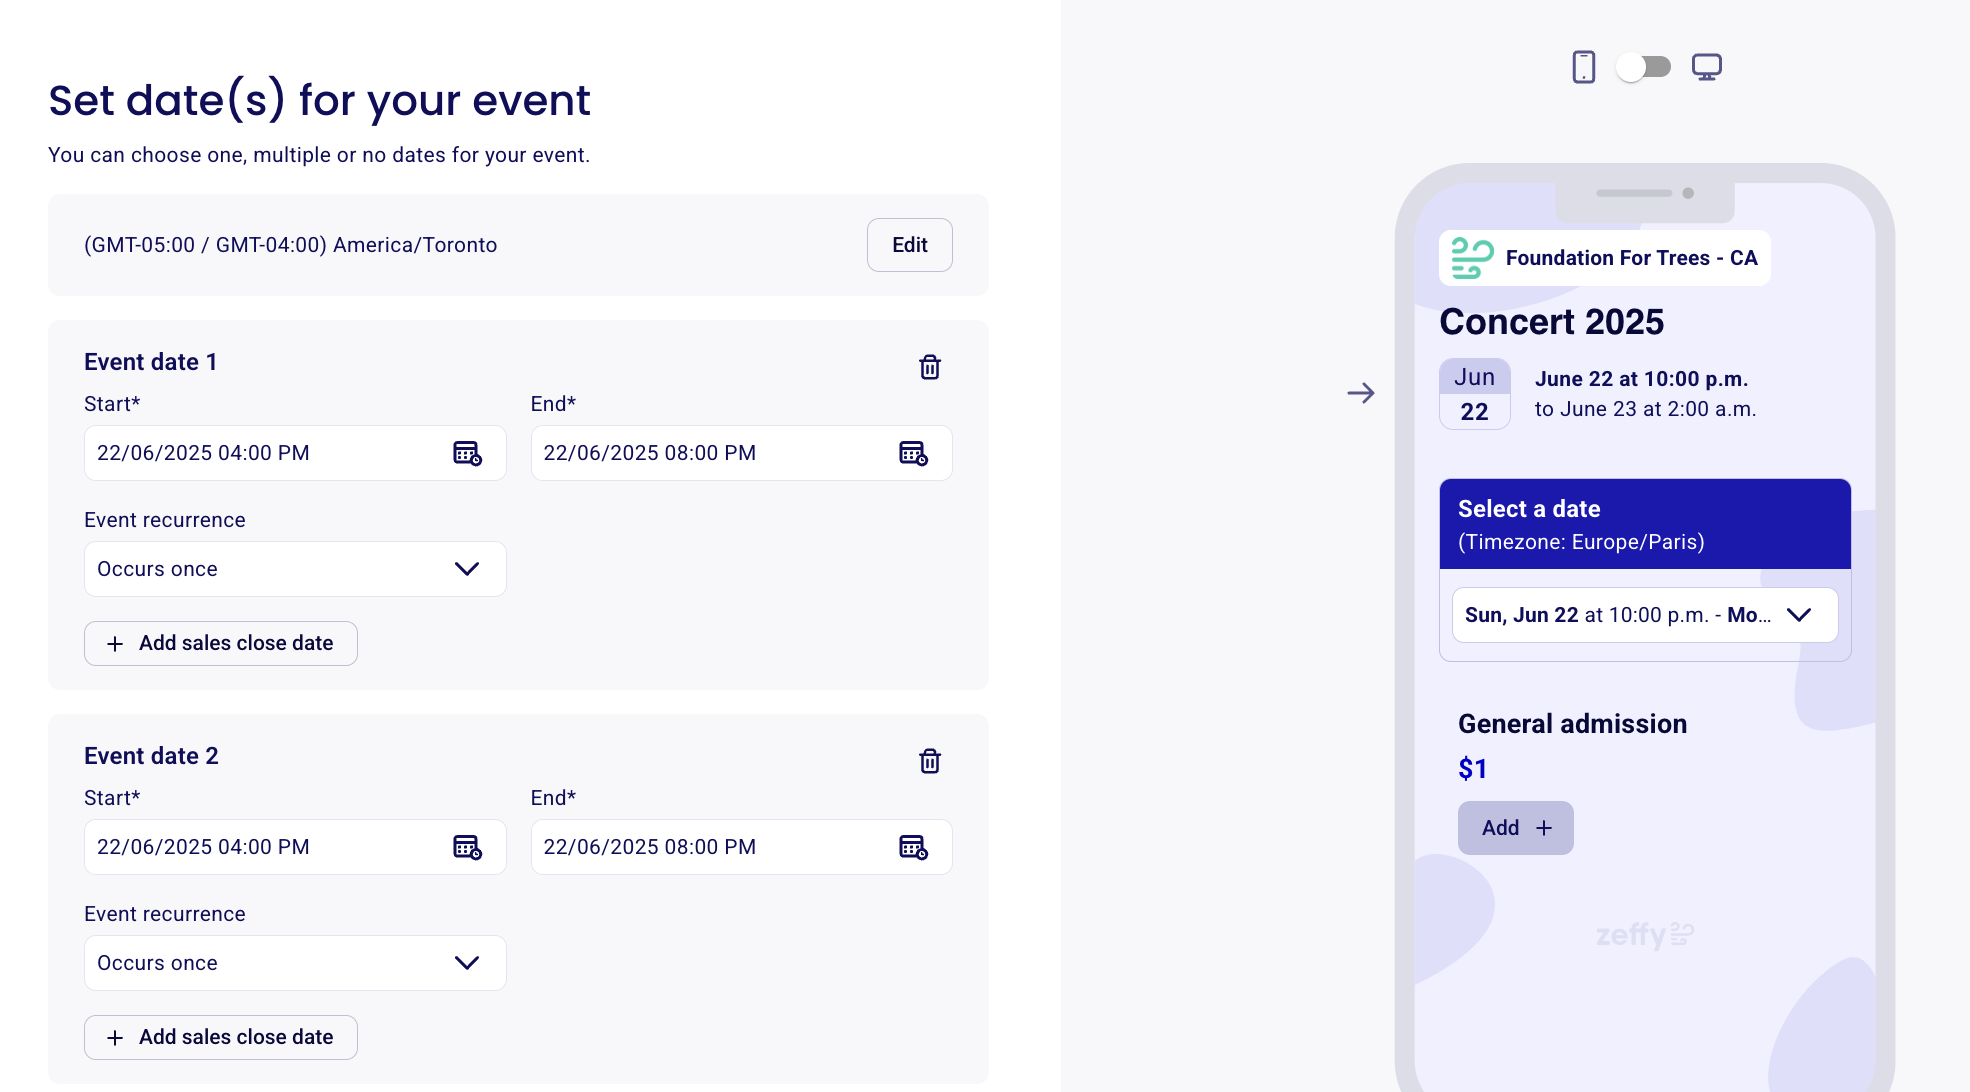
If the event occurs at the same time on a daily, weekly or monthly basis:
Click "Occurs once" below the date and select the event frequency from the dropdown options. The dates between the start date and the end date indicated will automatically be displayed in the drop down list.If the event occurs at sporadic dates or various times:
Leave the occurrence of the first date to "occurs once" and click "Add another event date" to add a new date or time.
You can set a close date for sales for each occurrence. If you wish to stop ticket sales for a certain period of time before the occurrence, set the "sales close date" for that day. Setting a close date will disable the option to select tickets when that date is selected. It is not mandatory to set a close date for your sales.
⏰ Need to setup your event dates and times for a specific timezone? The timezone setting is found in the "Advanced settings" of your campaign editor.
Create your ticket rates and set their availabilities
Go to the "Tickets" section of the form editor to configure your tickets.
It is not possible to offer different ticket rates, types or quantities for each date of your event. The tickets you configure will be available every day that your event takes place.
Understanding ticket availabilities and quantities for multi-date events
The "Total number of tickets per date" is where you indicate the total number of tickets that can be sold per date. This number includes all ticket types that you create. Your sales will be closed when that limit is hit.
To set a limited quantity of tickets per ticket type, click "See more options" on the ticket you wish to limit and enter the number available in the box under "Number of tickets available for this rate per event date." This will limit the number of that type of tickets that can be selected per date your event takes place.
It is not possible to set a limit of tickets for every occurrence. The limits apply per date/time the event takes place.
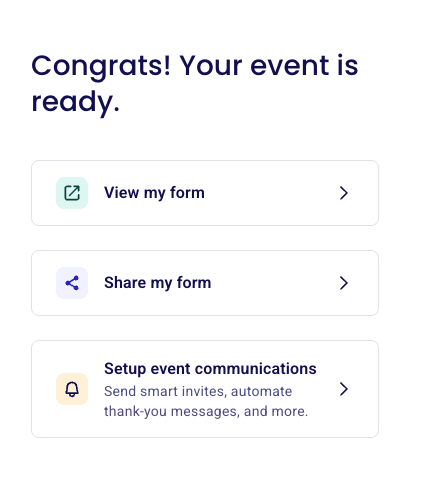
5. Configure your reminder email. In the "review" section of your form editor, click "Setup event communications" to configure your reminder email.
By default, the reminder emails will be sent out 7 days and 1 day before your event with a generic message. You can program the number of days before the event you wish for it to be sent and edit the message, you can also disable the reminder email from sending.

The reminder will be sent to participants at different times depending on the date/time selected to attend your event. It will be sent the exact number of days before the date and time of the event the participant selected. You can learn more about reminder emails here.
Obtain the sales/attendance reports for an event with multiple occurrences
For the entire multi-date campaign:
Go to the Campaigns tab
Click on the three dots to the right of your event
Click on "Manage event"
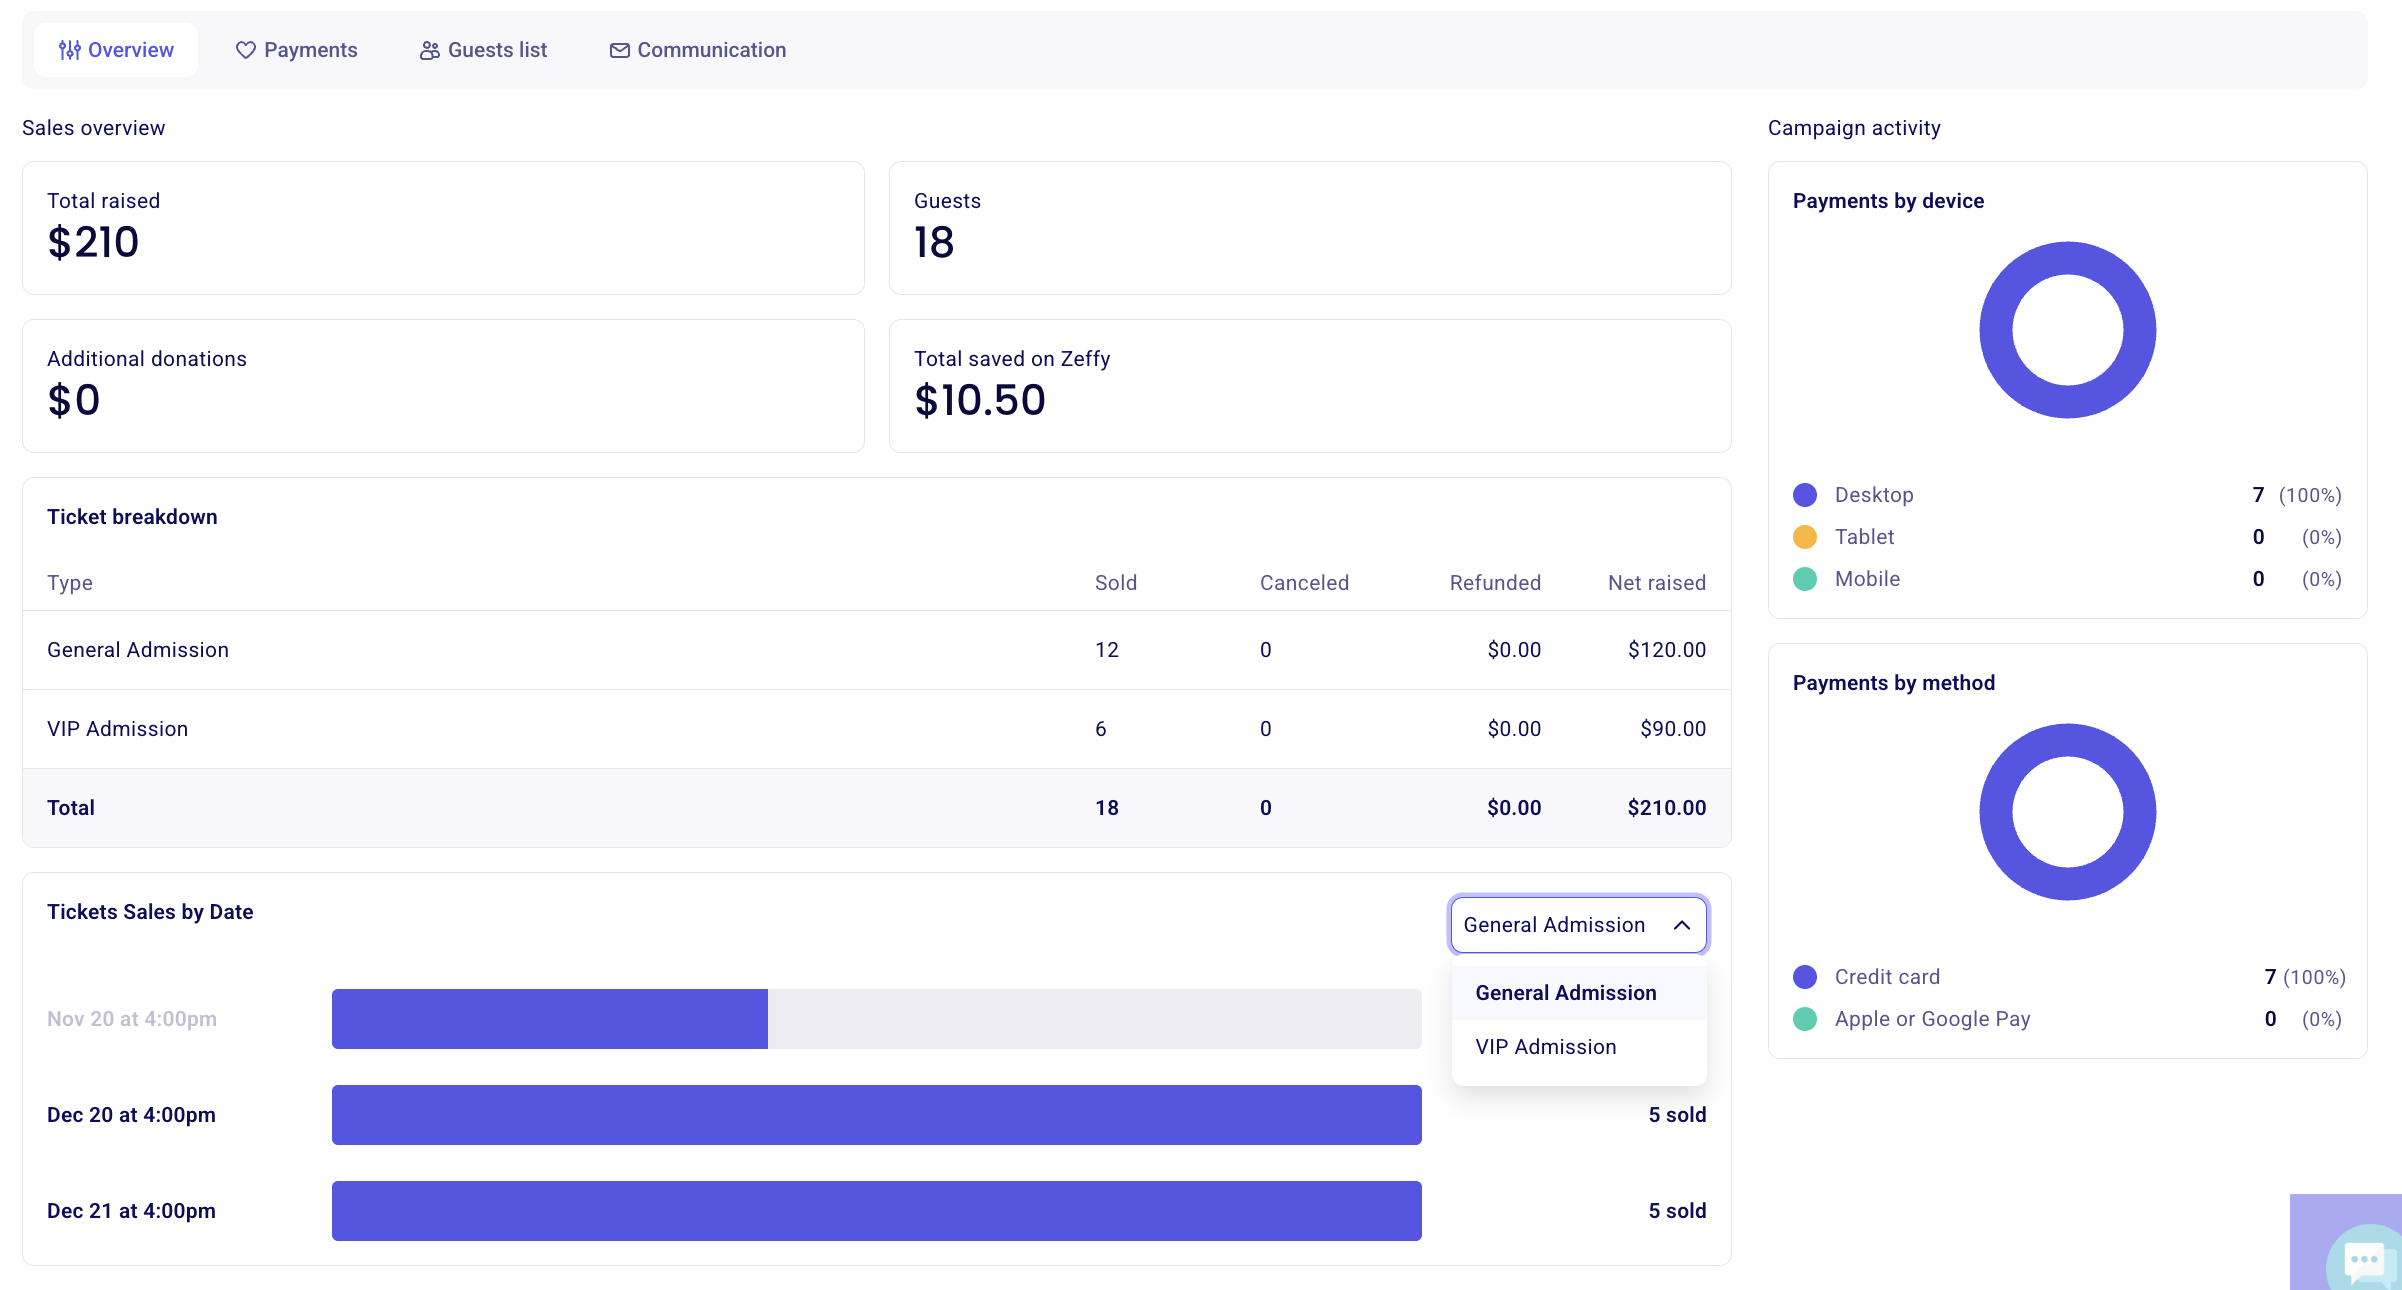
Consult the Overview tab for your total funds raised, total guests, ticket type breakdown and a breakdown of ticket sales by date
For a specific occurrence:
Go to the Campaigns tab
Click on the three dots to the right of your event
Click on "Manage event"
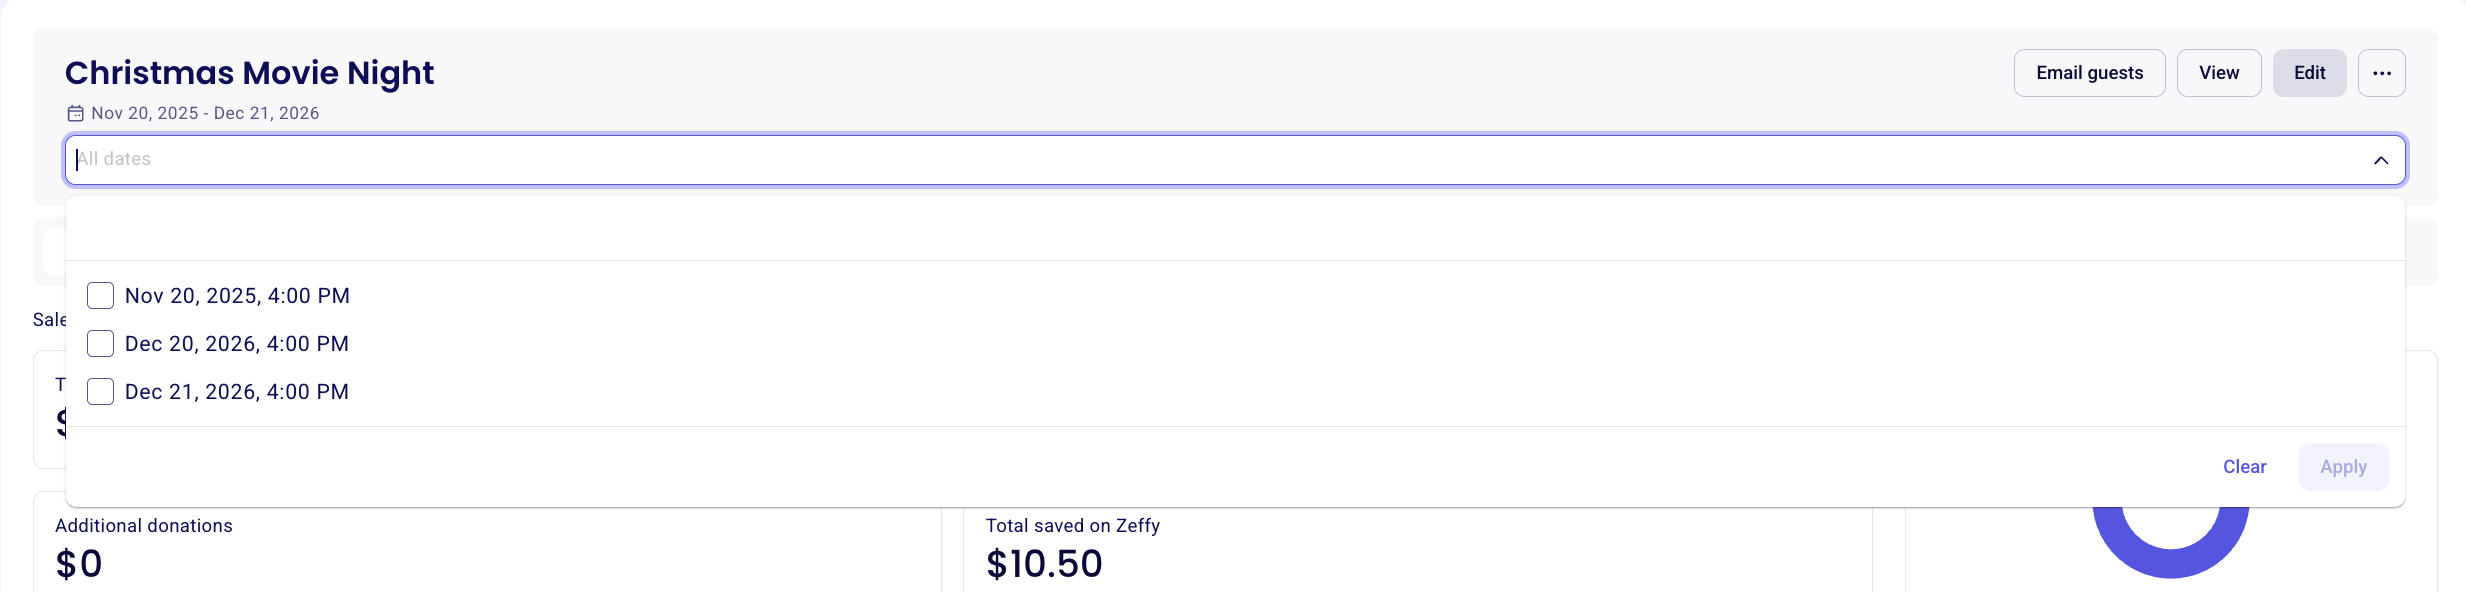
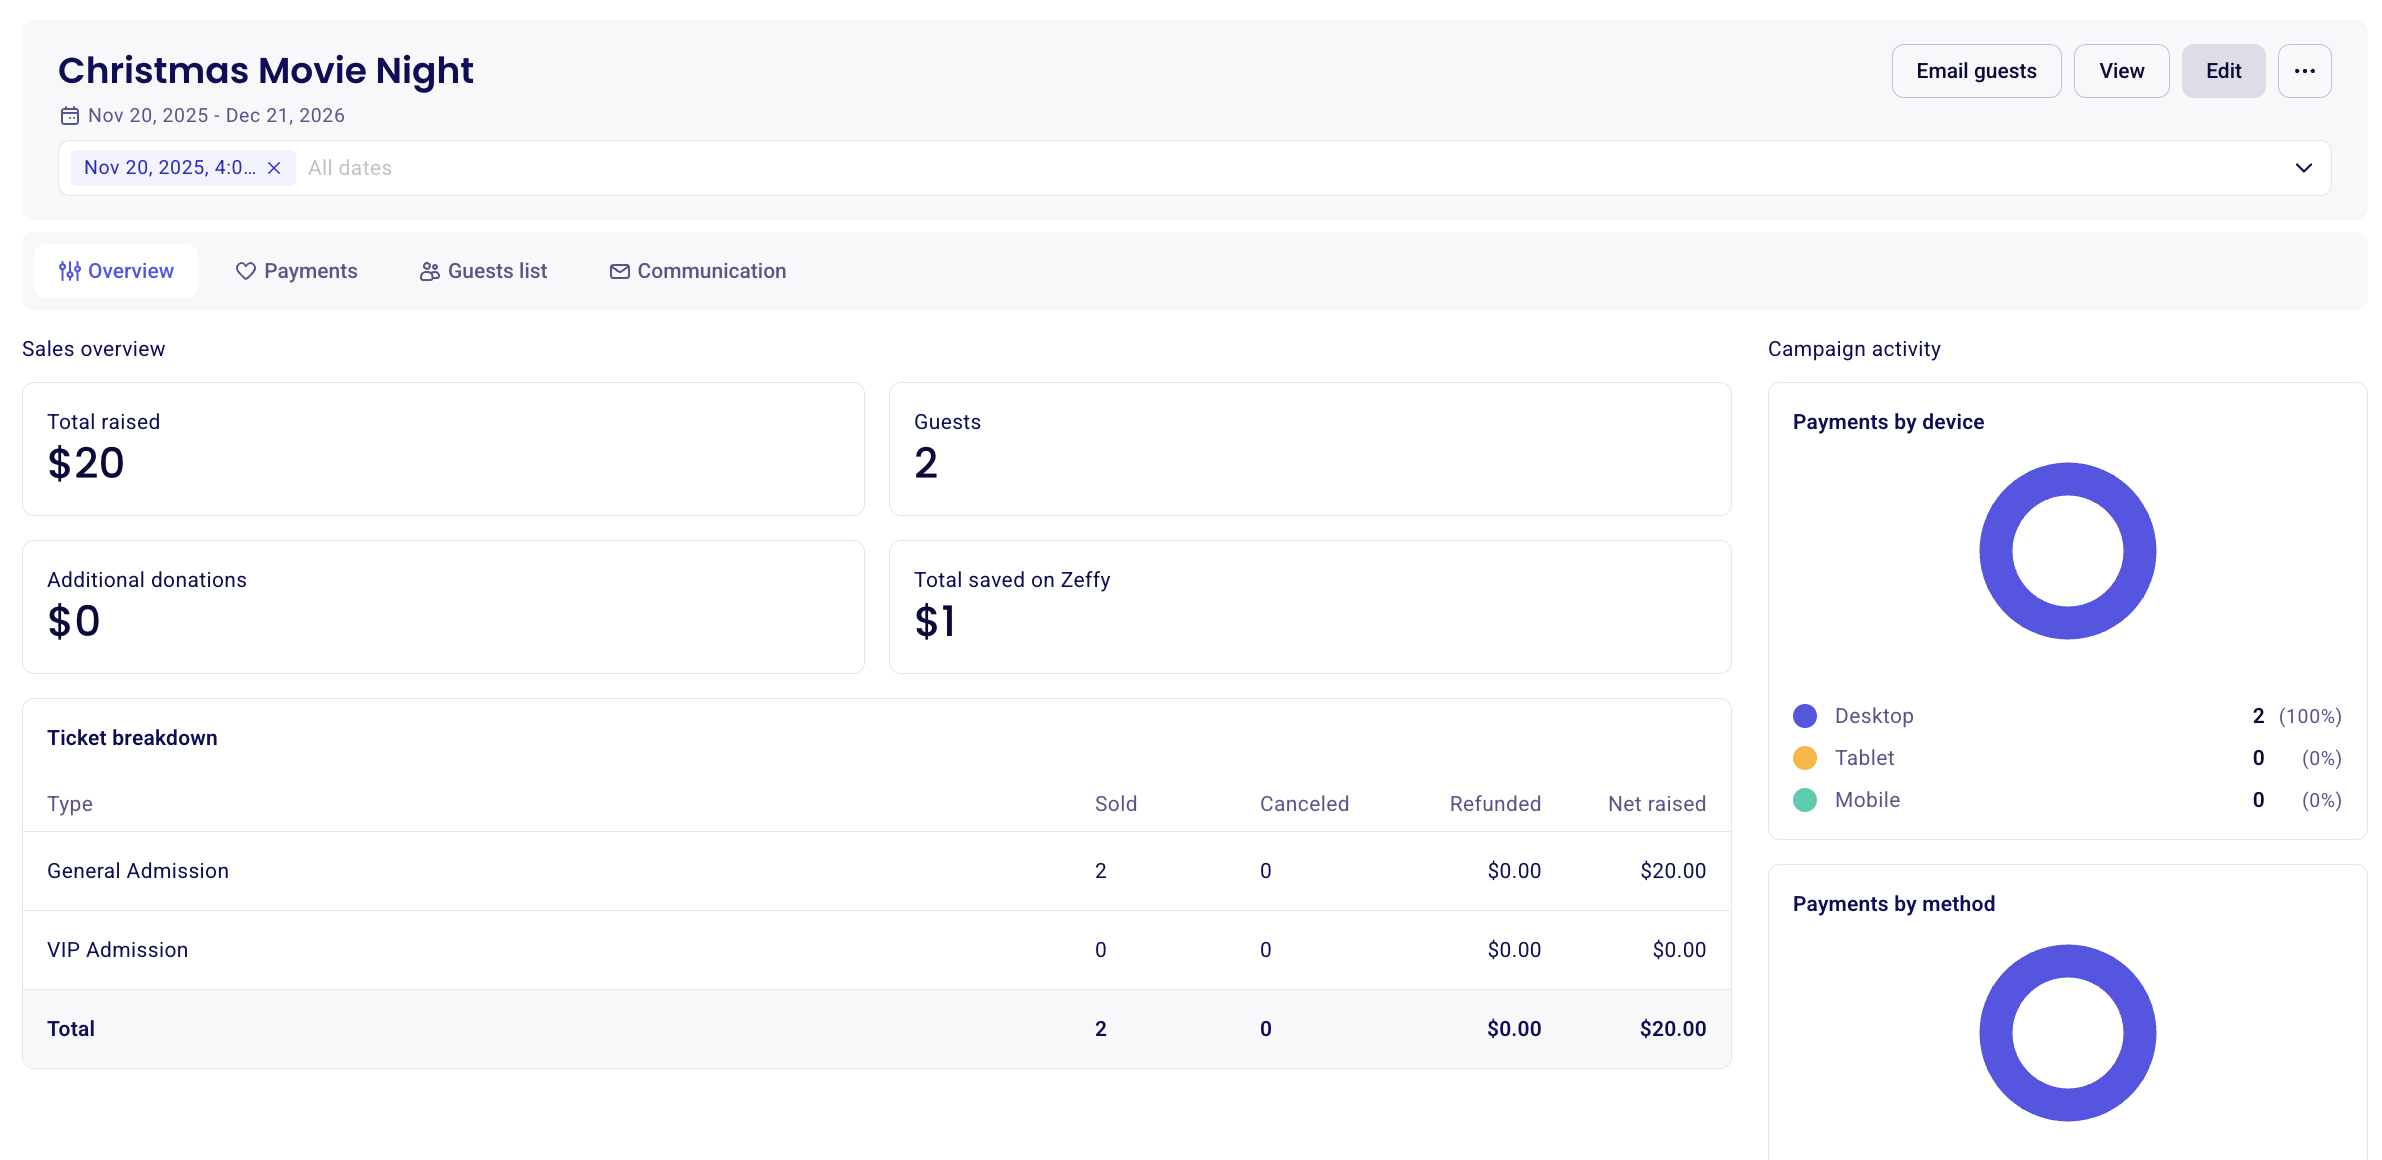
To filter your sales for a specific date, at the top of the page, select the "All dates" filter
You can then go to the "Payments" section of the campaign manager
Click "Export" to download a report of your purchases for this particular event date
You can also access your Guest list, select your guest that registered for this date and then click on export in the top right.
To quickly view the total amount raised for your event and the overall number of tickets purchased, refer to the"Overview" section to see the total raised, tickets sold, and ticket sales:
How to email your attendees for a specific date Zeffy
Go to the Campaigns tab
Click on the three dots to the right of your event
Click on "Manage event"
At the top of the page, select the "All dates" filter to filter your sales for the date in question
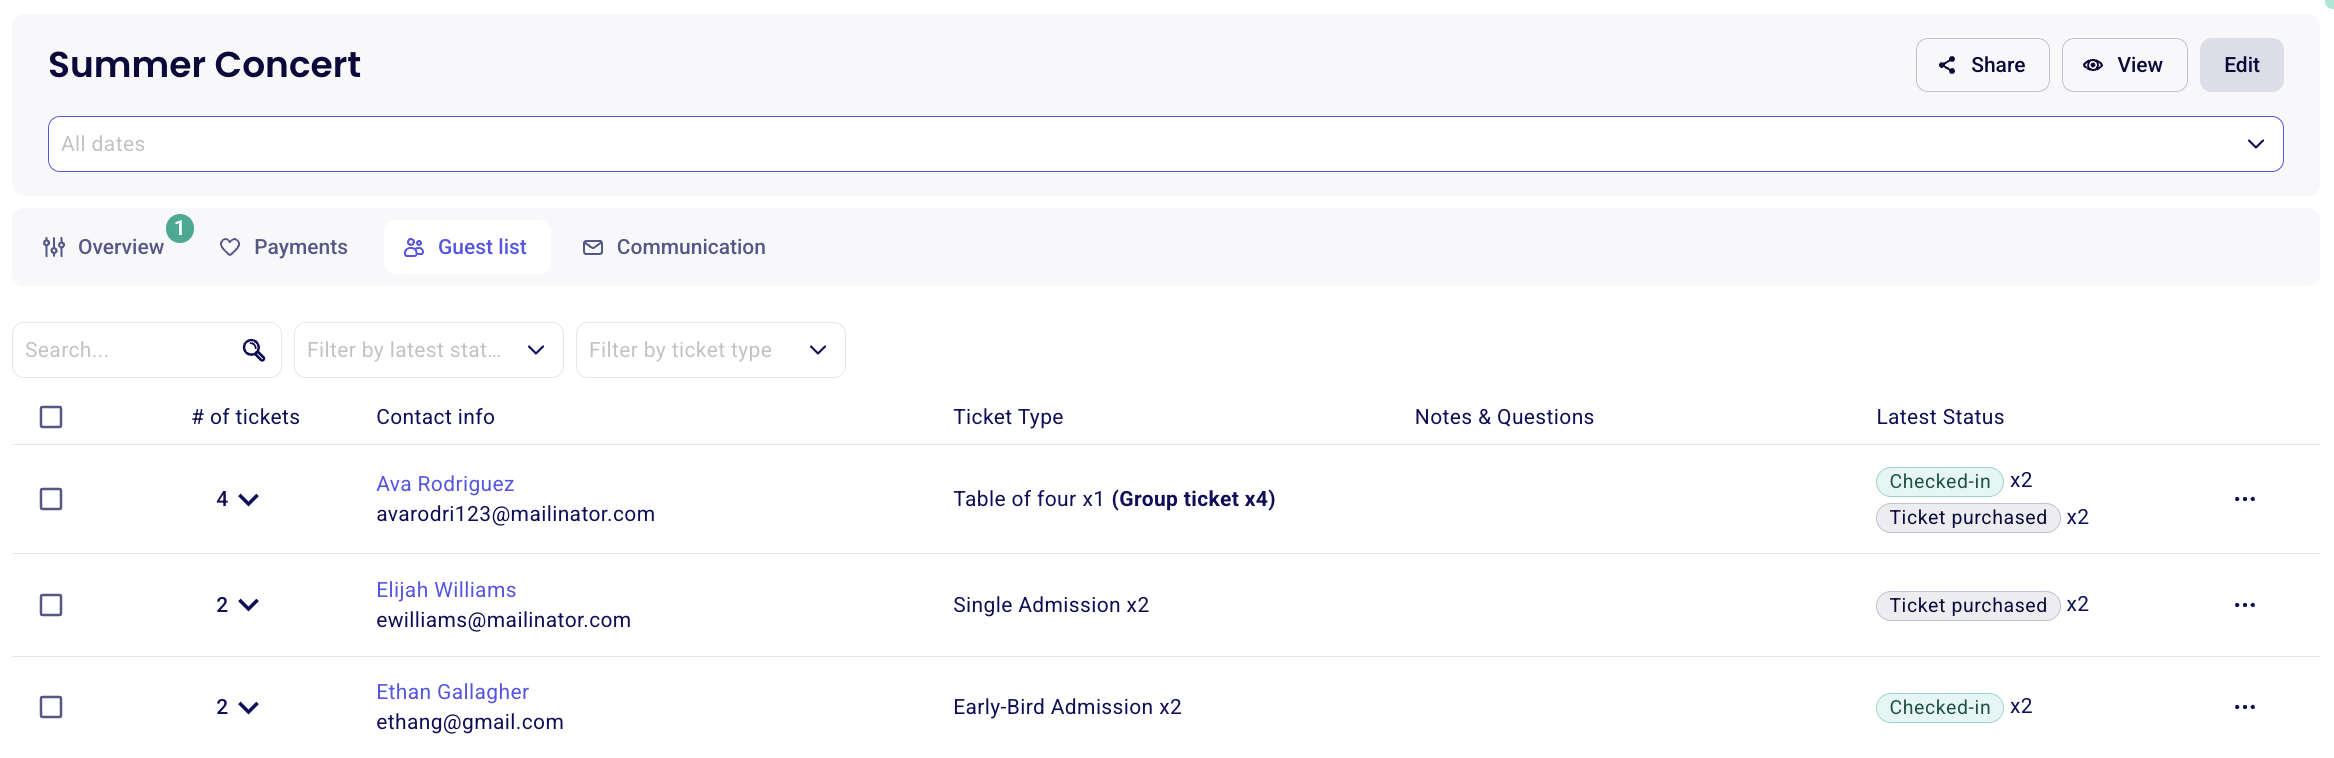
With the filter has been applied, go to the Guest List section where you can select your guests for this date by ticking the box in the top left-hand corner.
Once selected, a purple bar will appear, allowing you to initiate a new e-mail specifically for the participants of that date.