Sharing your Zeffy campaign with your supporters and community
Share your form link, create a donate button, embed it on your website, through a QR code, pop-up form and more!
Once you've created your form, the next step is to start sharing the form with your donors.
There are multiple ways that you can share your Zeffy form. Continue below to learn about the different options and how they work or click one of the links below to jump to a specific section of this article directly.
Get the link to share your form on social media, via email, etc.
Embed your form on your website
Embed a pop-up on your website
➡️ Direct Sharing Link
With all Zeffy campaigns, you can share a link directly with your donors or community. This is great if you want to share a link on a social media page or send a donation link via email. To find the sharing link:
- Go to "Fundraising", then "Campaigns" and hover your mouse over the form you would like to share, and click on Edit.
- At the top of the page, click on the "share my form" button.

- A pop-up will open showing you the different sharing options you have access to.
- Click on copy to copy the URL and paste it to wherever you want to share your form (Facebook, email, LinkedIn, text message, etc.)
- You can also click on any of the social icons below the link if you'd like to share the form through one of the listed channels.

Create a "donate" button on your website
Using the main sharing link described earlier in this article, you'll be able to add a "donate" button to your website.
You will need access to the backend of your website. Click here to watch our tutorial on how to add a button to your website
Create a donate button following your website host's instructions. Then, insert the sharing link URL for the "Donate" button on your webpage. Add the link to your custom button – when users click the button, they are redirected to the donation page.
➡️ QR Code
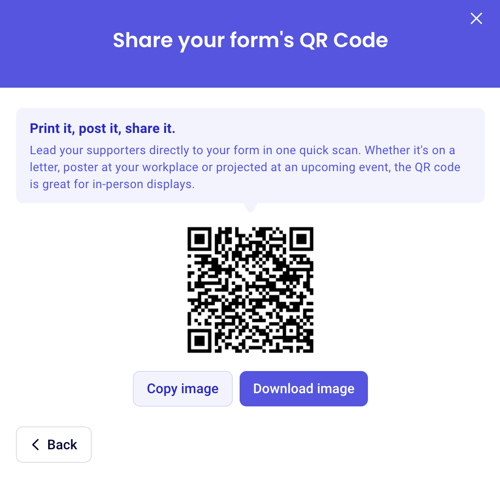
The QR code allows you to share your form on your physical communications (letters, direct mail, in-person events). This allows your supporters to use their mobile device camera to quickly access your campaigns and contribute.
- Access your Zeffy dashboard by logging into your account
- Go to "Fundraising", then "Campaigns" and hover your mouse over the form you would like to share, and click on Edit.
- At the top of the page, click on the "share my form" button.

- A pop-up will open showing you the different sharing options you have access to.
- Click on "QR code" to access the QR code option.

- Click on "copy image" to copy your QR code to your clipboard. You'll be able to paste it into the communication materials of your choice.
- Click on "download image" to download a png version of your QR code onto your device.

➡️ Embedding your form
- Access your Zeffy dashboard by logging into your account
- Go to "Fundraising", then "Campaigns" and hover your mouse over the form you would like to share, and click on Edit.
- At the top of the page, click on the "share my form" button.

- A pop-up will open showing you the different sharing options you have access to.
- Click on "embed on your website" to access the custom HTML code of your form

- You will then be prompted to choose how you'd like to embed your form

Please note that the options "thermometer" and "leaderboard" are only available for peer-to-peer campaigns.
Option 1: Embedding your form
Embedding your form will require you to copy the HTML code on Zeffy and paste it into an iframe element on your website. Click here to watch our embedding tutorial.

Click on "copy" next to your HTML code and paste the HTML code into a designated box on your website. 💡 Here are some additional video tutorials to help you.
- Wix: Embedding Custom Code to Your Site
- WordPress: Adding Code to Headers
- Squarespace: Using code injection
- Duda: How to Add Code in the Header
- GoDaddy: Add HTML or custom code to my site
- Strikingly: Add custom code
- Webflow: How to add custom head and body code
- Webnode: How to Add HTML Code into the Site Header
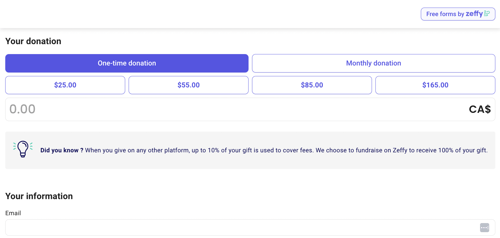
❗Please note that the embedded versions of our forms will not display your form description, images, logo, or non-profit name. This is currently how our embedded forms are set to behave – they will only show the donation and payment information, not the image and description.
If you would like more information on your embedded form, we recommend adding it to your website (above your embed, for example).

Option 2: Embedding a pop-up
To Wix users : Wix has officially ended its support for pop-up embeds. As a result, it is no longer possible to implement the Zeffy pop-up form on Wix websites. The regular integration (embed/iframe) is still supported.
Embedding your a pop-up will allow your form to appear through a pop-up modal when a button on your website is clicked.

- Copy and paste the button code (first code provided) onto a custom HTML button you’ve added to your website. See the example button below. The code should be entered in place of YOURZEFFYCODE.
- Copy and paste the header code (second code provided) into the Scripts of your website Header.
Example button custom html (with options to customize the color and wording)
<style>
                button.zeffy-btn {
                background-color: #YOURHEXCOLOUR;
                border: none;
                border-radius: 5px;
                box-sizing: border-box;
                color: white;
                cursor: pointer;
                left: calc(50% - 75px);
                margin: 10px;
                min-height: 50px;
                min-width: 150px;
                padding: 5px 10px;
                text-transform: uppercase;
                top: calc(50% - 25px);
                display: flex;
                justify-content: center;
                align-items: center;
            }
        </style>
        <button class="zeffy-btn" YOURZEFFYCODE>
            Donate
        </button>
Option 3 (Peer-to-Peer Only) - Thermometer
Embedding your thermometer will allow you to only embed the "thermometer" section of your form on your website. This is a great way to share your campaign's progress without needing to embed the whole form.

You will need to copy the HTML code for the thermometer embed on Zeffy and paste it into an iframe element on your website.

💡 Here's how to add an iframe element to your website to paste the HTML code.
- Wix: Embedding Custom Code to Your Site
- WordPress: Adding Code to Headers
- Squarespace: Using code injection
- Duda: How to Add Code in the Header
- GoDaddy: Add HTML or custom code to my site
- Strikingly: Add custom code
- Webflow: How to add custom head and body code
- Webnode: How to Add HTML Code into the Site Header
Option 4 (Peer-to-Peer Only) - Leaderboard
Embedding your leaderboard will allow you to only embed the "leaderboard" section of your form on your website. This is a great way to show a list of teams and participants without needing to embed the whole form.

You will need to copy the HTML code for the leaderboard embed on Zeffy and paste it into an iframe element on your website.

💡 Here's how to add an iframe element to your website to paste the HTML code.
- Wix: Embedding Custom Code to Your Site
- WordPress: Adding Code to Headers
- Squarespace: Using code injection
- Duda: How to Add Code in the Header
- GoDaddy: Add HTML or custom code to my site
- Strikingly: Add custom code
- Webflow: How to add custom head and body code
- Webnode: How to Add HTML Code into the Site Header