Embed or integrate a form on a website (Wix, Wordpress, Squarespace, and more)
Embed or integrate your Zeffy form to your website so payments can be made without ever leaving your organization's webpage.
Step 1: Retrieve your form's HTML code in Zeffy
- Access your Zeffy dashboard by logging into your account
- Go to "Fundraising" > "Campaigns" and click the "Share" button. The option to share will only appear if your bank account is connected and your form is open.

- A pop-up will open showing you the different sharing options you have access to. Select "Other sharing options".
- Click on "embed on your website" to access the custom HTML code of your form

- Choose the option "form" embed and copy the HTML code provided to you.

Step 2: Add the code to your website
Watch the tutorial below to learn how to add the HTML code to your website.
*This tutorial is filmed on a Wix site, but the same steps apply to any website host.
Embedding on Wordpress - Watch the tutorial
Embedding on Squarespace - Watch the tutorial
💡 Some other tutorials to help you:
- Wix: Embedding Custom Code to Your Site
- WordPress: Adding Code to Headers
- Squarespace: Using code injection
- Duda: How to Add Code in the Header
- GoDaddy: Add HTML or custom code to my site
- Strikingly: Add custom code
- Webflow: How to add custom head and body code
- Webnode: How to Add HTML Code into the Site Header
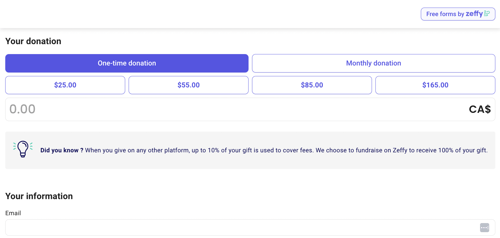
❗Please note that the embedded versions of our forms will not display your form description, images, logo, or non-profit name. This is currently how our embedded forms are set to behave – they will only show the donation and payment information, not the image and description.
If you would like more information on your embedded form, we recommend adding it to your website (above your embed, for example).
