How can I set up partial tax receipts?
You can set up partial tax receipts in Zeffy for event sales, memberships, raffle tickets, and e-commerce forms.
Yu can set up partial tax receipts for an event or for items that you are selling. For example, if you have a charity dinner where the entry price is $50, but only $30 is eligible for a tax receipt, you can easily set this up.
Step 1: Make sure your account is set up correctly!
- Log into your Zeffy dashboard on a computer.
- Click on your name at the bottom lefthand corner of your dashboard. This goes to your settings.
🇨🇦 Canadian Accounts:
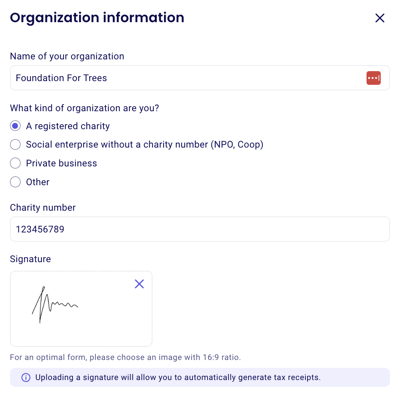
- 1️⃣ Click on "Organization Information": Make sure you have selected that you are a registered charity. Enter your charity number and upload the signature of someone who can represent your nonprofit.
- 2️⃣ Click on "Visual identity": Make sure to upload a logo.
💡 The signature and logo are mandatory to generate tax receipts in your account.

🇺🇸 US Accounts:
- 1️⃣ Click on "Organization Information": Make sure you have selected that you are a 501(c)(3) organization. Enter your EIN and save your changes.
- 2️⃣ Click on "Visual identity": Make sure to upload a logo.
💡 The EIN number and logo are mandatory to generate tax receipts in your account.
Step 2: Turn on automatic partial tax receipt generation on your form
- Go to "Campaigns" under ''Fundraising'' on your left-hand side and click on "Edit" to the right of the form for which you want to activate automatic tax receipts. (If you don't have a form yet, you can create one).
- Jump to the "Tickets" section of your form editor. Underneath each ticket, you will see the word "See more options". Click on it.
- Check the option to generate a charity receipt. You can now select the amount that is eligible for a tax receipt.

- Click "Save" in the top right-hand corner. You're all set! Tax receipts will be automatically generated and sent to donors when they make a purchase through this form.