Managing Thank You (Confirmation) Emails
When a payment is made on Zeffy, a confirmation email (also referred to as a “thank you” email) is automatically sent to the donor or buyer.
Scroll down to learn everything about confirmation emails (how they work, how to edit them, check their delivery status, and resend them if needed) or click on a section below to jump directly to it.
How do confirmation emails work?
Zeffy automatically sends a confirmation email for every successful payment made on the platform. The email is sent immediately after the transaction is completed and includes:
A payment receipt
Transaction details
Your custom thank you message
Any documents associated with the payment (e-ticket, tax receipt, etc.)
If a tax receipt or e-ticket was generated for the payment, it will be attached to the confirmation email. If no document was generated, the email will still be sent, but without attachments.
How can I edit the thank you email sent to donors?
In your Zeffy dashboard, click on "Campaigns" on the left side menu.
To the right of the campaign you'd like to customize, click on "Edit".
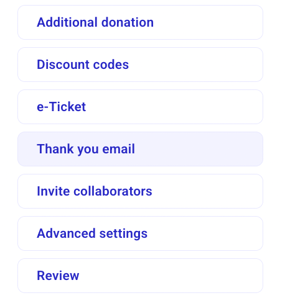
Head to the “Thank you email” section in the navigation bar of your form editor.
Please note that this section may be labeled “Automated emails” when editing an event form with a date.
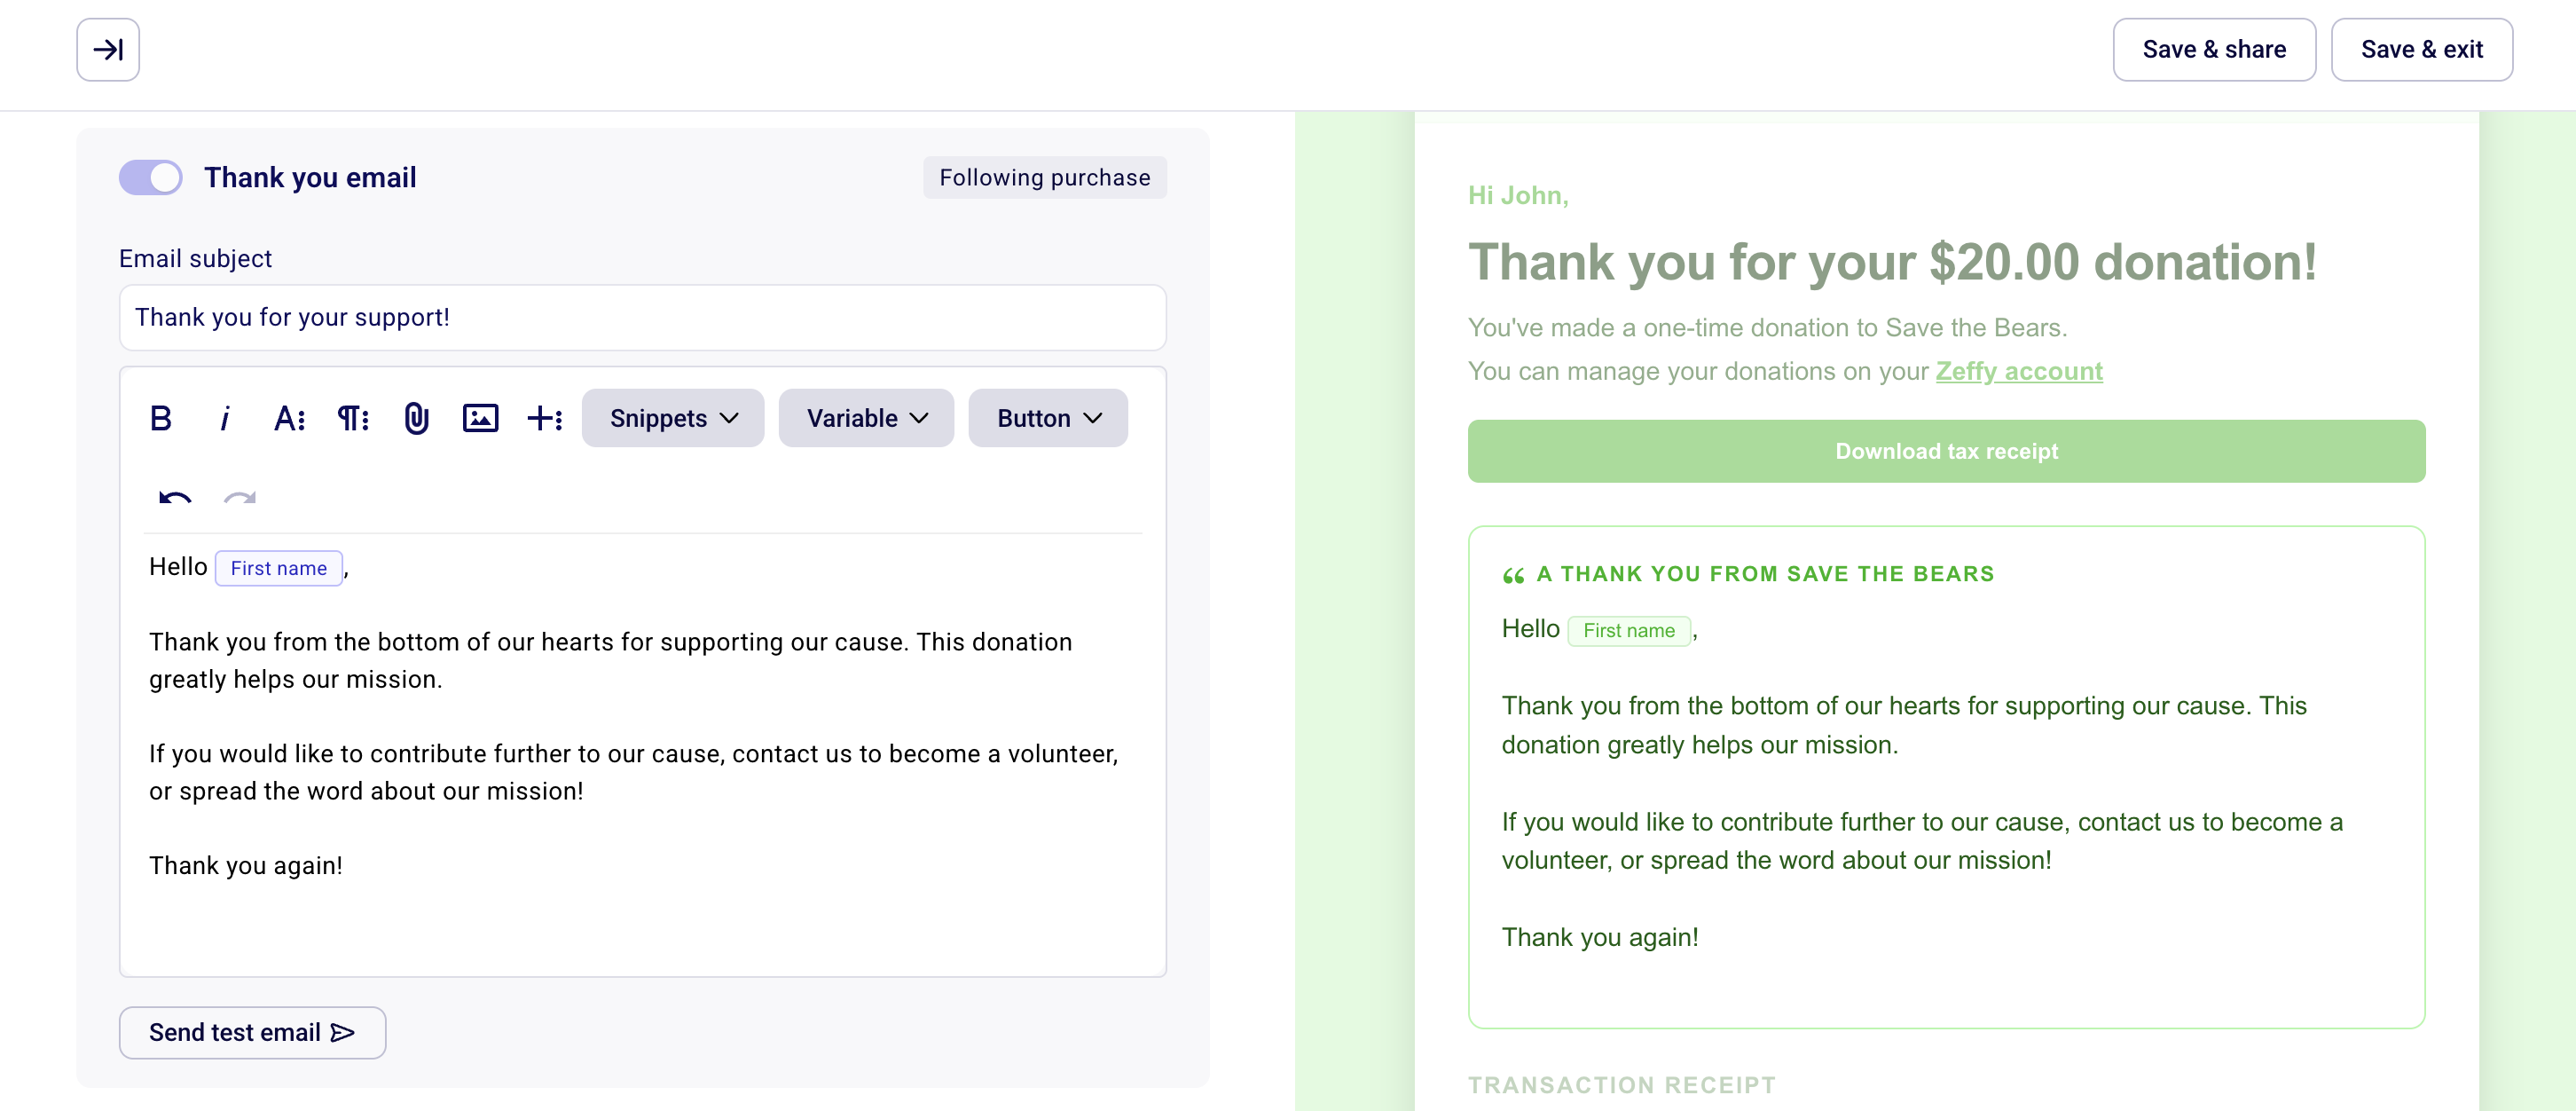
Once in the "thank you email" section or the "automated emails" section, you'll be able to personalize the text of the message. The colour of the thank you email automatically adapts to your organization's brand colour, giving donors a polished, on-brand confirmation after they give.
💡 Confirmation emails have high open rates. Take this opportunity to thank your supporters and also to communicate additional information about your campaign or event.
⚠️ Frequently asked questions about customizing the thank you email:
Can I change the design of the confirmation email? Confirmation emails now automatically use your organization's brand colours for a polished, professional appearance. You can still edit the message, add images, and variables to personalize the content.
Is there a way to have different thank you emails for various ticket types, items, or membership levels? Creating different "thank you emails" based on the ticket/item/membership type purchased is not possible on the software at this time. Although we don't offer this feature at the moment, we invite you to add this to our product request platform. As a workaround, to send a personalized thank you email for each ticket tier, you can create a separate form tailored to each tier.
How can I check the status of a confirmation email?
If a donor reports that they did not receive their confirmation email, you can verify the delivery status directly from your dashboard.
To check the email status:
Log into your Zeffy dashboard.
Head to Payments and locate the transaction in question.
Click on the payment for which you would like to consult the email status.
Please make sure not to click on the donor’s name. Clicking on the name will take you to their contact page, which does not contain the email status information described here. Instead, click anywhere else on the payment line.
Once you've clicked the payment, a panel will open on the right side of the screen.
Scroll to the Thank you communications section at the bottom of the panel to verify the status of Zeffy's automated confirmation email.
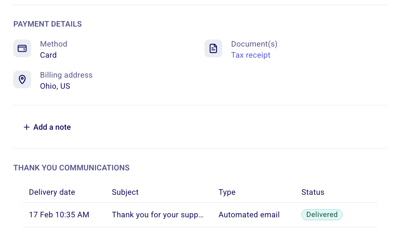
Common statuses include:
Delivered: The email was successfully delivered to the donor’s email provider but has not been opened or clicked. If the donor cannot find it, ask them to check their spam, junk, or promotions folder.
Opened: The email was successfully delivered and opened.
Clicked: The email was opened and at least one link inside the email was clicked.
Bounced/Failed – The email could not be delivered, often due to an incorrect or invalid email address. In this case, you may resend the email to the corrected address by following the steps outlined below.
How do I resend a confirmation email, receipt, or e-ticket?
If a donor did not receive their email or needs it sent again, you can resend it from your dashboard. To resend a confirmation email:
Log into your Zeffy dashboard.
Head to Payments and locate the transaction in question.
Click on the payment for which you would like to consult the email status.
Please make sure not to click on the donor’s name. Clicking on the name will take you to their contact page, which does not contain the email status information described here. Instead, click anywhere else on the payment line.
Once you've clicked the payment, a panel will open on the right side of the screen.
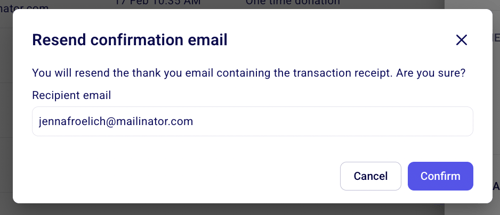
From there, click on More or Actions in the top right corner, then select Resend the receipt.
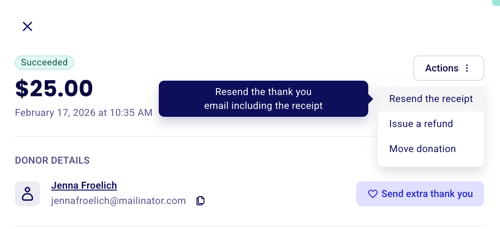
You will be prompted to confirm the email address to which the receipt should be resent. By default, this will be the email address used at the time of purchase. However, you may update it if you need to resend the receipt to a different email address.
Click Confirm once the recipient email address is correct. A copy of the confirmation email (including your thank you message, the payment receipt, and any associated documents) will then be resent.