
Adding a seating chart to your event
To integrate a seating chart or floor plan to your Zeffy form, we recommend adding your seating chart to your form description and then allow guests to select their seat using custom questions.
The reserved row and seat will show up on the buyer's e-ticket so that they can easily find their seat the day of your event.
Step 1. Add your seating chart to your form
The first step to creating an event with a seating chart will be to upload a photo of your seating chart to your Zeffy form.
To help you get started, we have created a free seating chart template that you can easily duplicate and customize for your event.
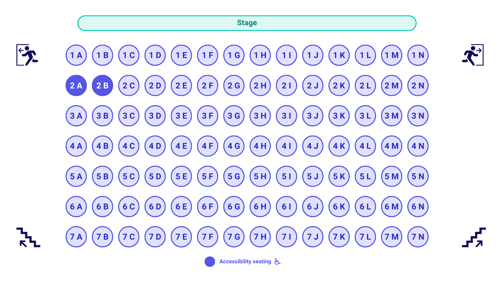
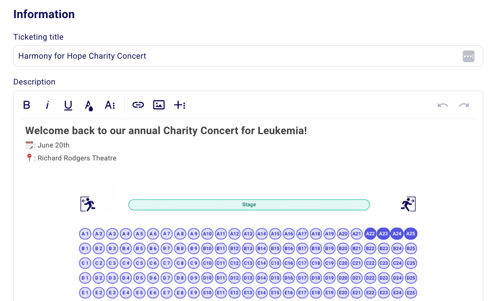
Once your seating chart is ready, you can add the image to the description of your Zeffy form.
Step 2. Add a ticket type for each row or table
Add a ticket rate for each available row of your seating chart, so that your buyers can select the row of their choice.
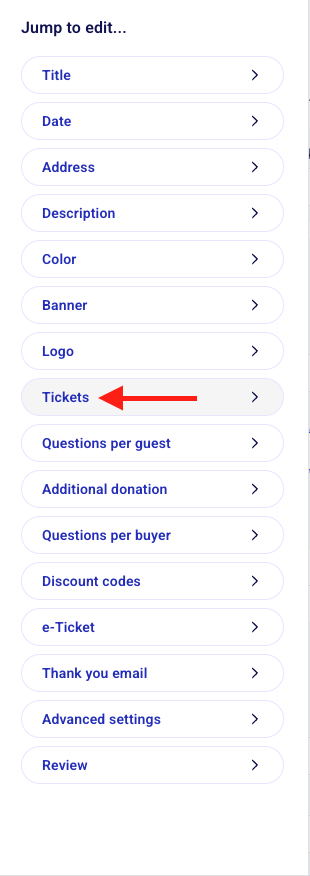
To add a ticket type for each row, go to campaigns and click on edit to the right of an event form. In your editor, go to "tickets" section.
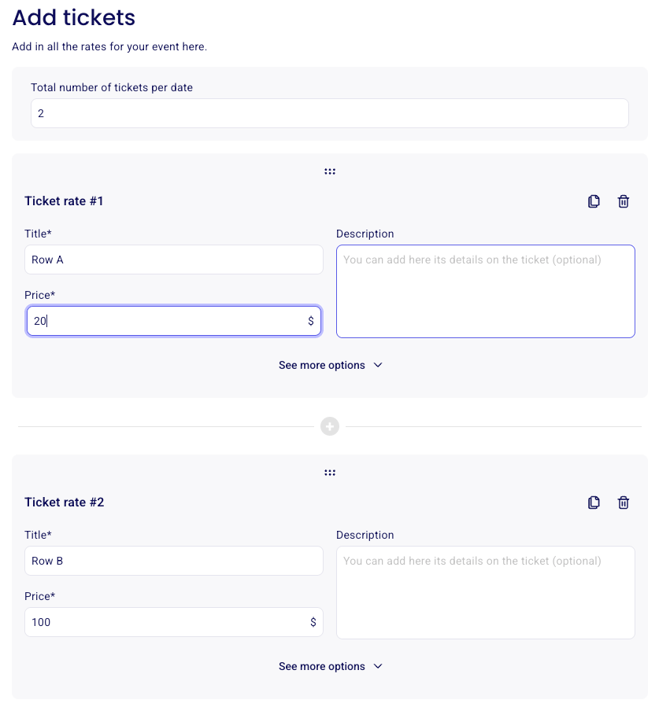
Scroll down to your ticket rates and add a different rate for each row. Make sure to specify the row in question in the ticket name.
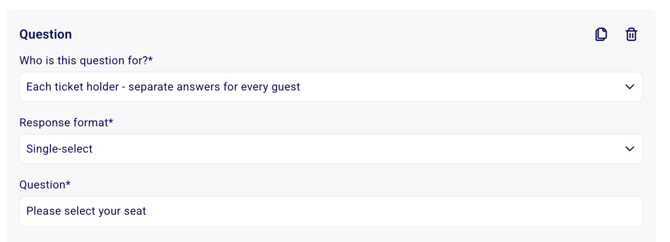
Step 3. Add custom question for seat selection
You will now be able to add different custom questions allowing your guests to choose the seat of their choice in the row that they selected.
You will have to add a question for each row by clicking on "+ add a question" at the bottom right to limit seat selection properly.
To add the seat selection options, head to the "Questions" section in your form editor
Select "Each ticket holder - separate answer for every guest" in the "Who is this question for?" section
Make sure to select the type of question as "Single-select"
Then, make sure to check the option "only for specific tickets" and associate this question with exactly one of your ticket types/rows.
➡️ This question will now only be asked to buyers that have selected this specific ticket type and row.
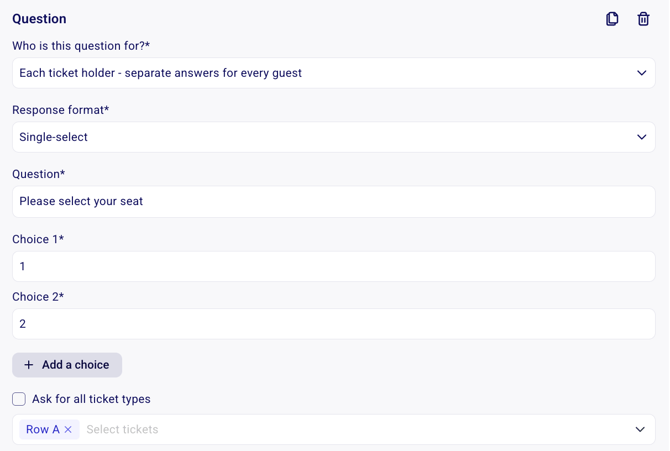
Once you have associated the custom question with a specific ticket and row, click on "add a maximum choice limit."
Add a choice for each seat in that specific row, and make sure to set the limit to one.

Make sure to set the question as "Required" to make sure each buyer submits an answer.
Duplicate the custom question set-up for each ticket type/row by clicking the copy icon next to the delete icon. Make sure you edit which row the question is asked for each time.
What does my buyer see?
At checkout, when your buyer selects their row, they will be able to select the seat within that row they would like to select.
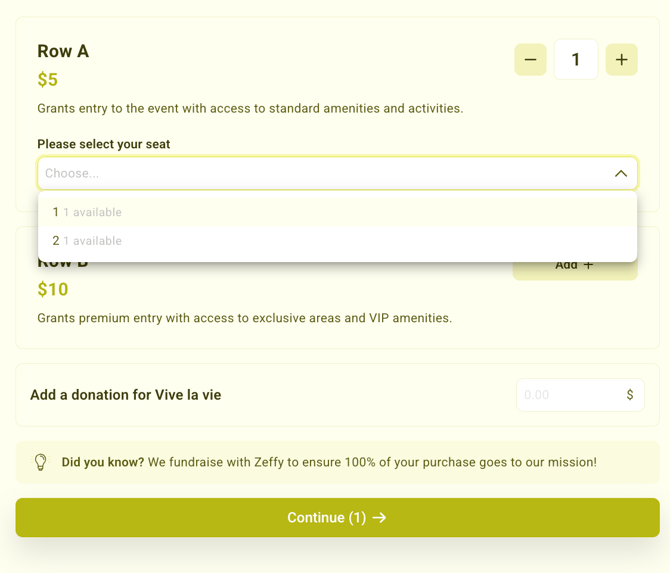
Once the seat has been selected and reserved by a guest, it won't be available anymore.
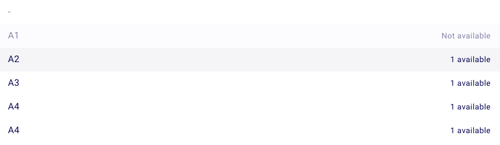
How do I see which seats have been selected?
To pull your sales report and see which rows and seats have been assigned to each buyer, you can export your Itemized payment report. To obtain this report...
Login to Zeffy
Navigate to "Fundraising" > "Campaigns"
Click on your campaign to be brought to the campaign manager
In the campaign manager, navigate to "Payments"
Click "Export" above the list of payments. Select the "Itemized payments" report type to obtain a report of all sales, ticket details and seat selection.
If you are checking in guests on the day of the event, you will also see their selected ticket type (row) and answer to custom question (seat number) to assign them to their seat.